Simulateur Sheetfed
Accès à la presse
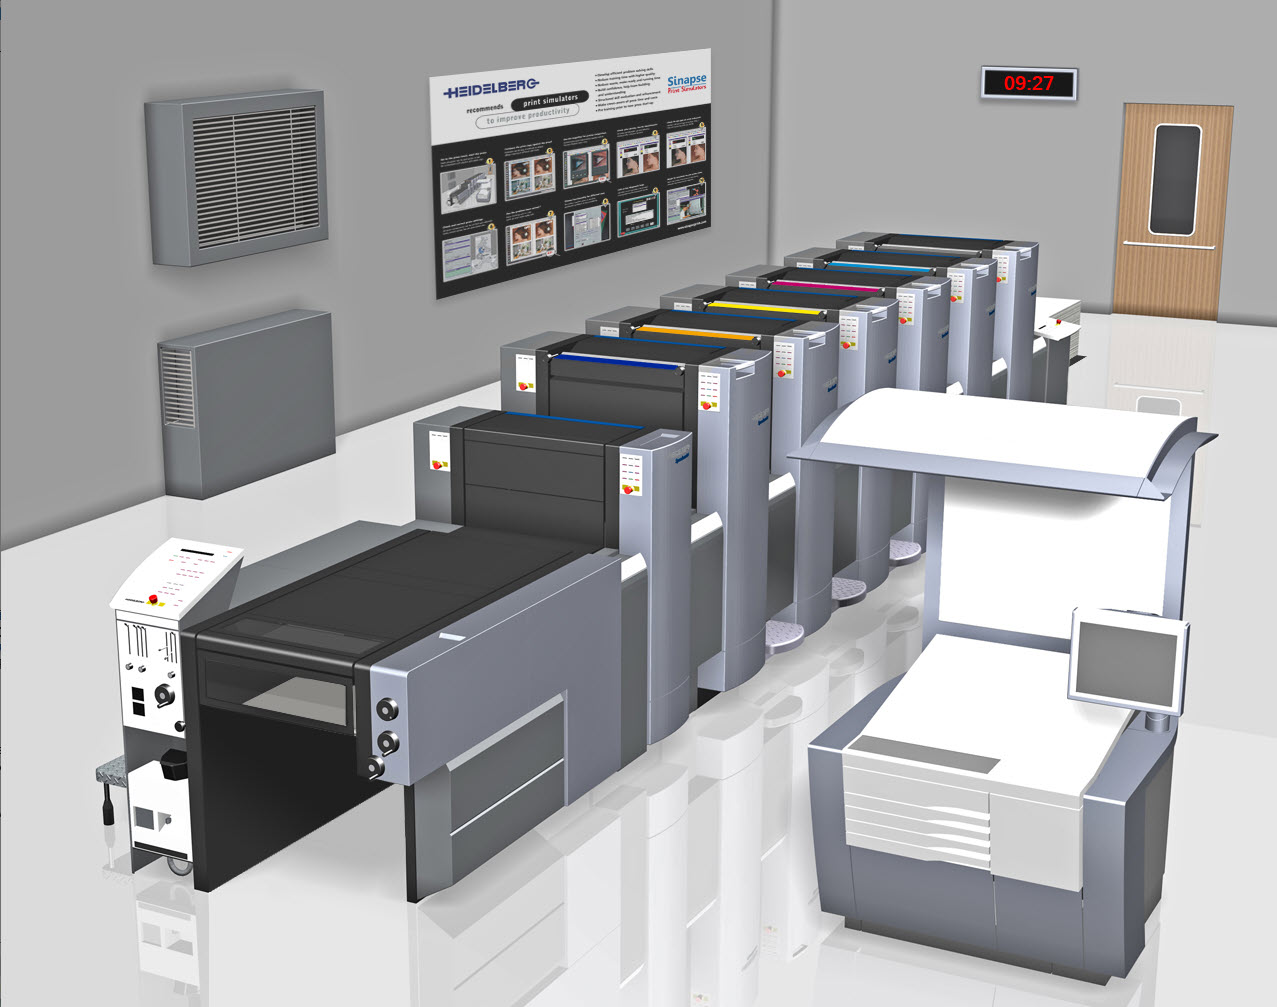
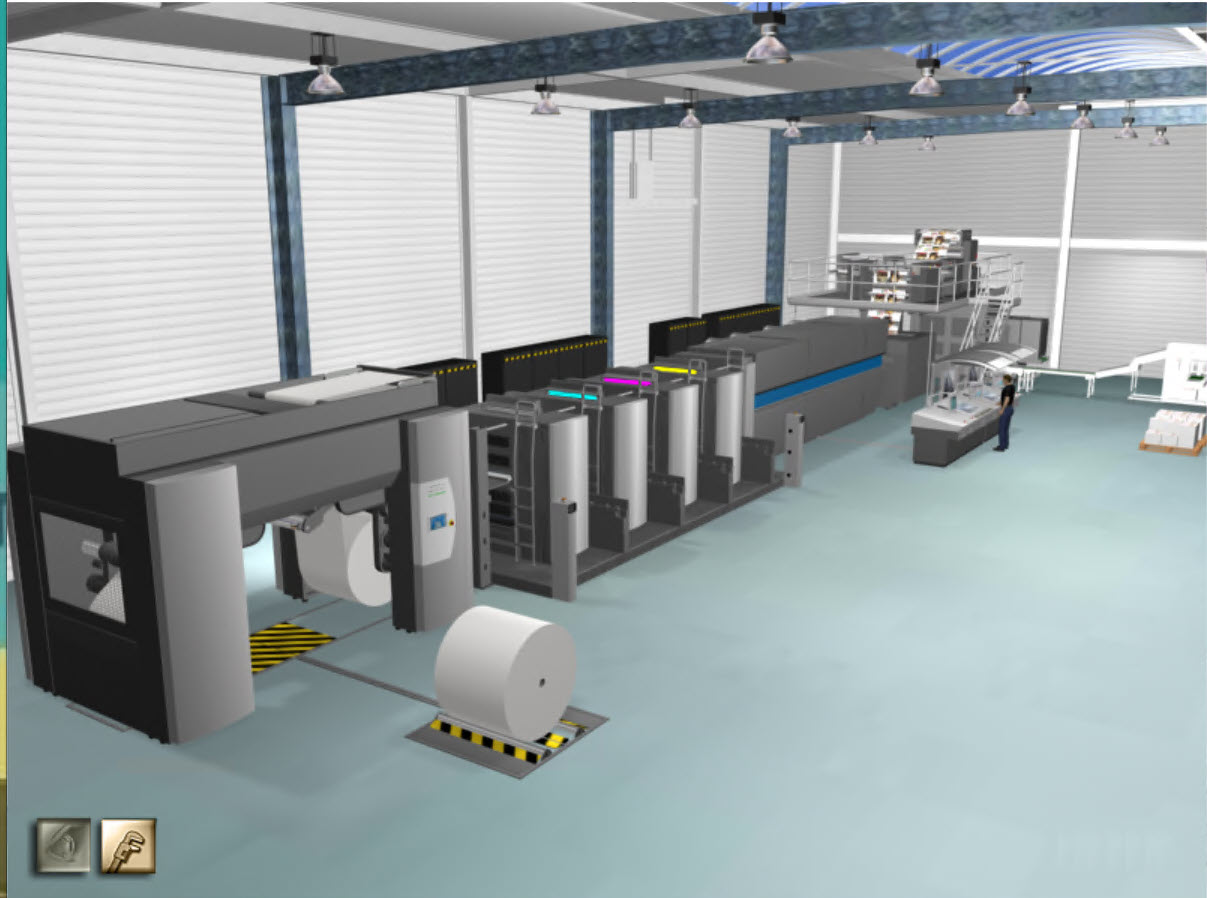
Depuis l'atelier, vous avez accès a une presse capable d'imprimer jusqu'a 6 couleurs avec degrade en un seul passage papier.
Le pupitre de commande est un systeme de contrôle avec 8 écrans, chacun d'eux permettant d'accéder aux differentes fonctions du simulateur.
Simulateur Sheetfed
Ecran de démarrage
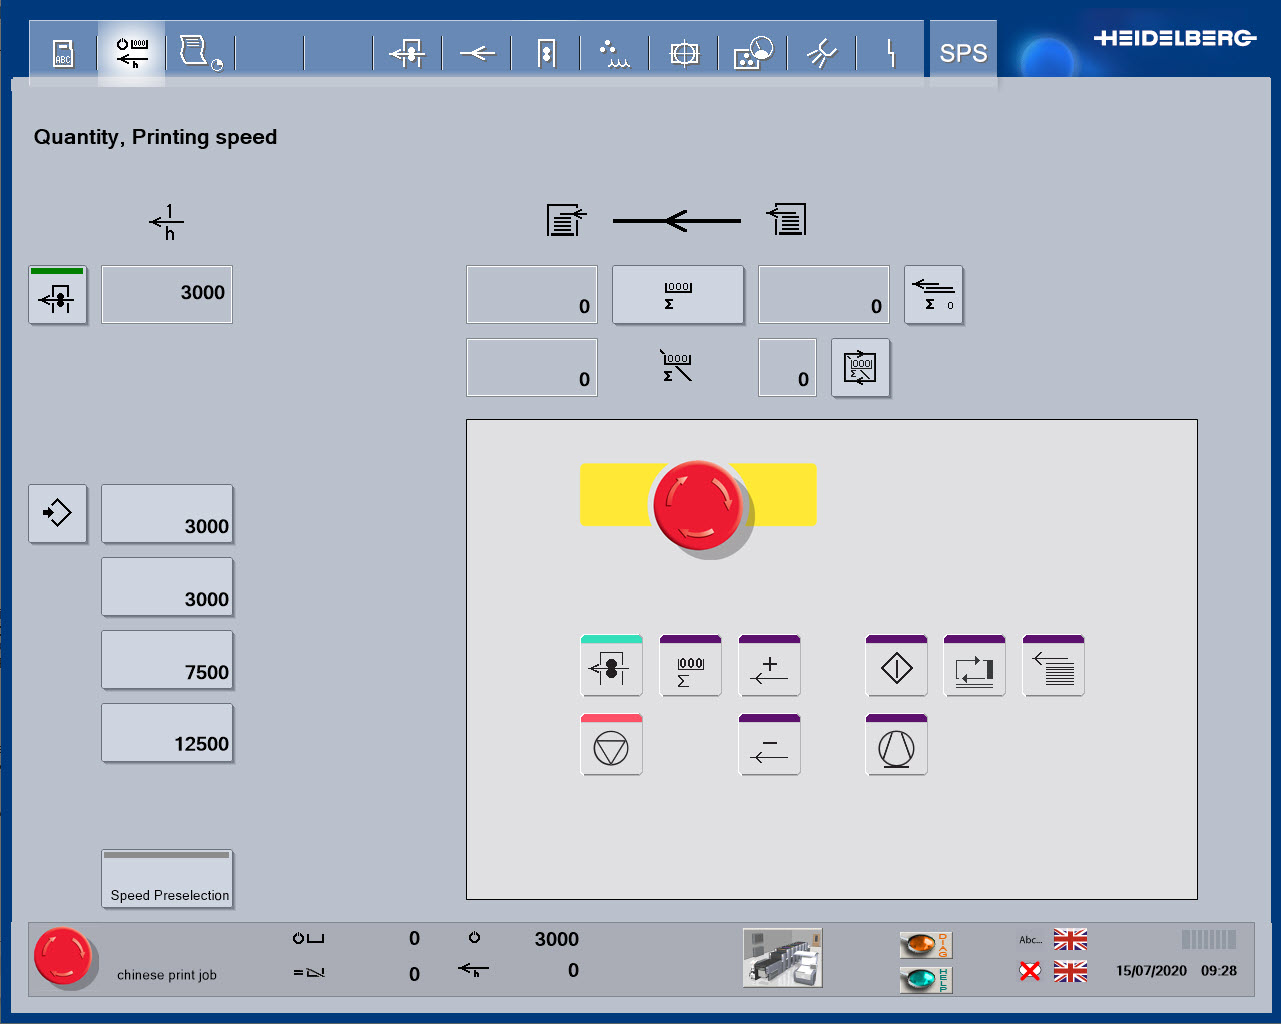
Depuis la "Quantity / Printing Speed" screen, you can start the press and go to the copy desk to get a new print copy.
Simulateur Sheetfed
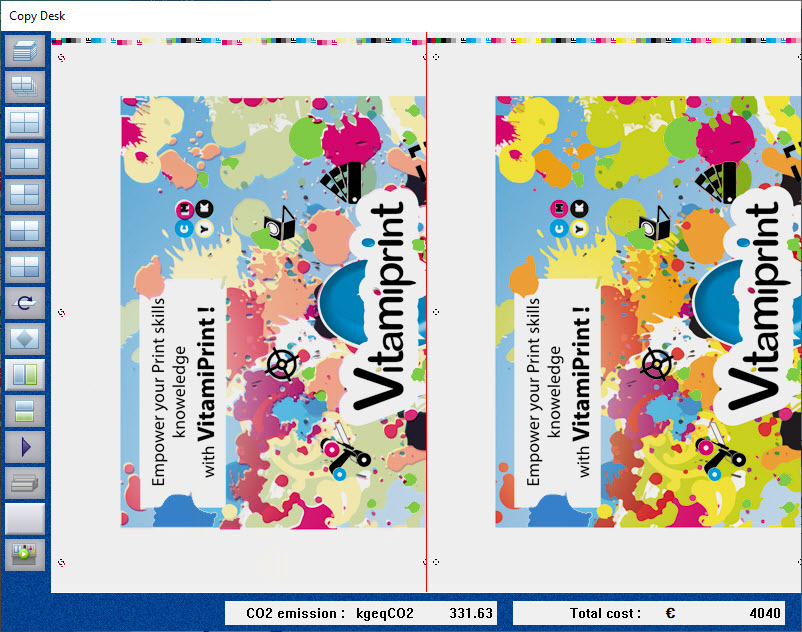
Print copy
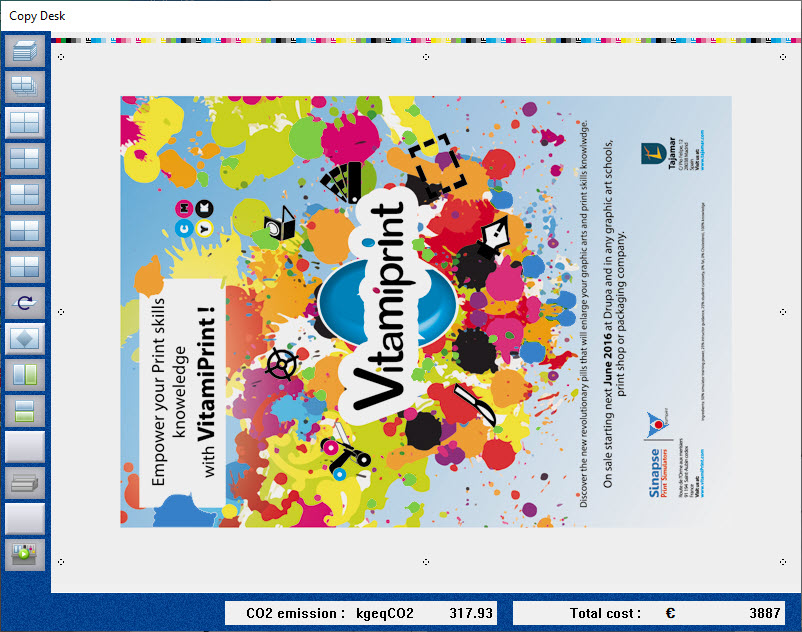
The copy desk is the place in the simulator to collect and view the printed images.
Just like on a real press, each time changes are made, a new print must be produced, and a new print copy collected to view.
Simulateur Sheetfed
Print function
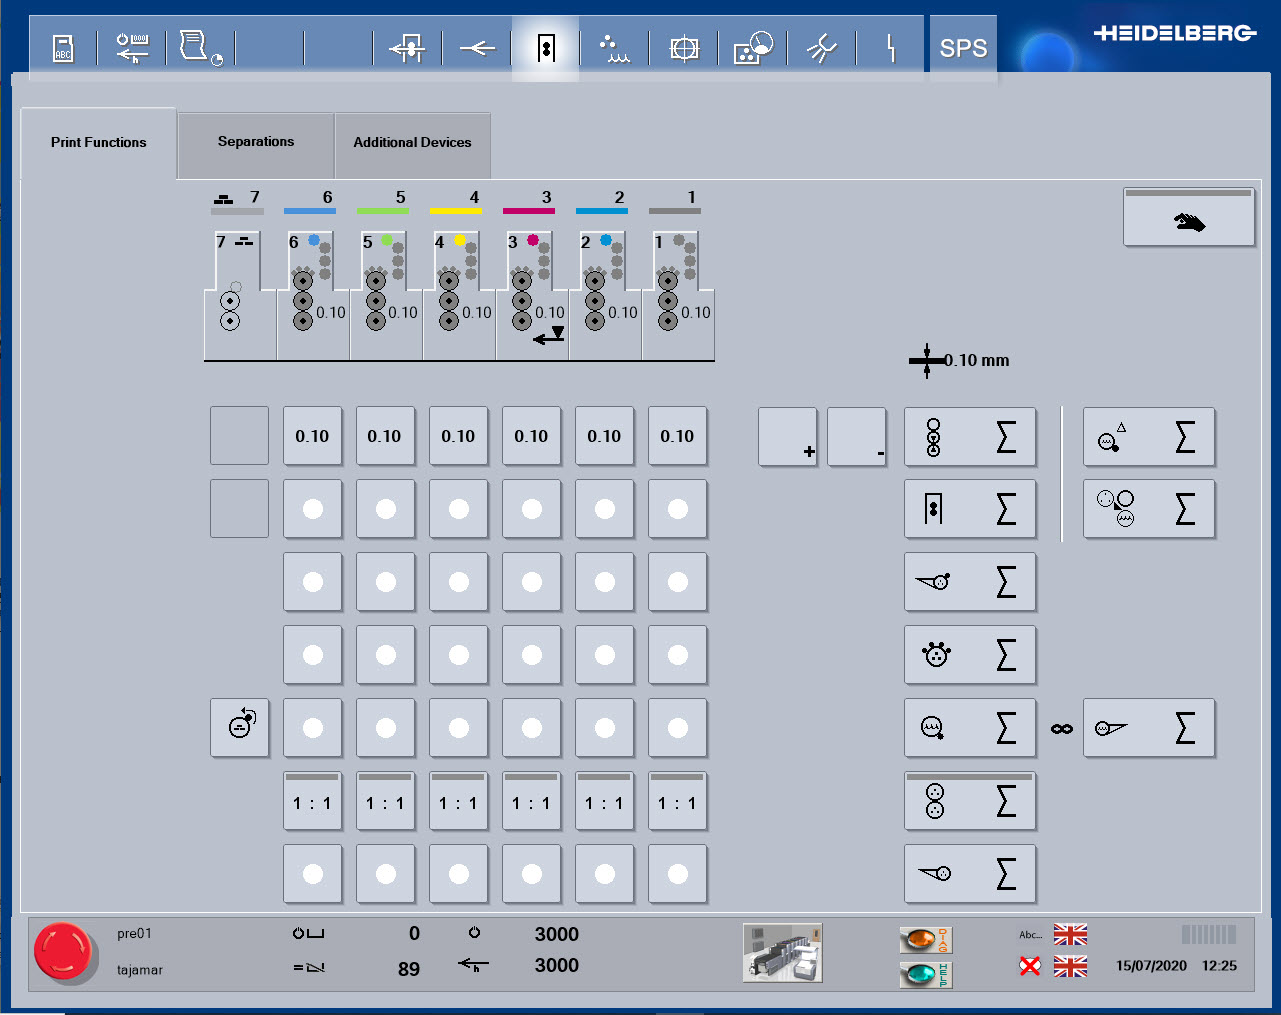
Press configuration in terms of whether a print unit is engaged or off can be checked here.
A basic check for press function is to check that all of the print units required are switched on, remember this for the following exercises.
Simulateur Sheetfed
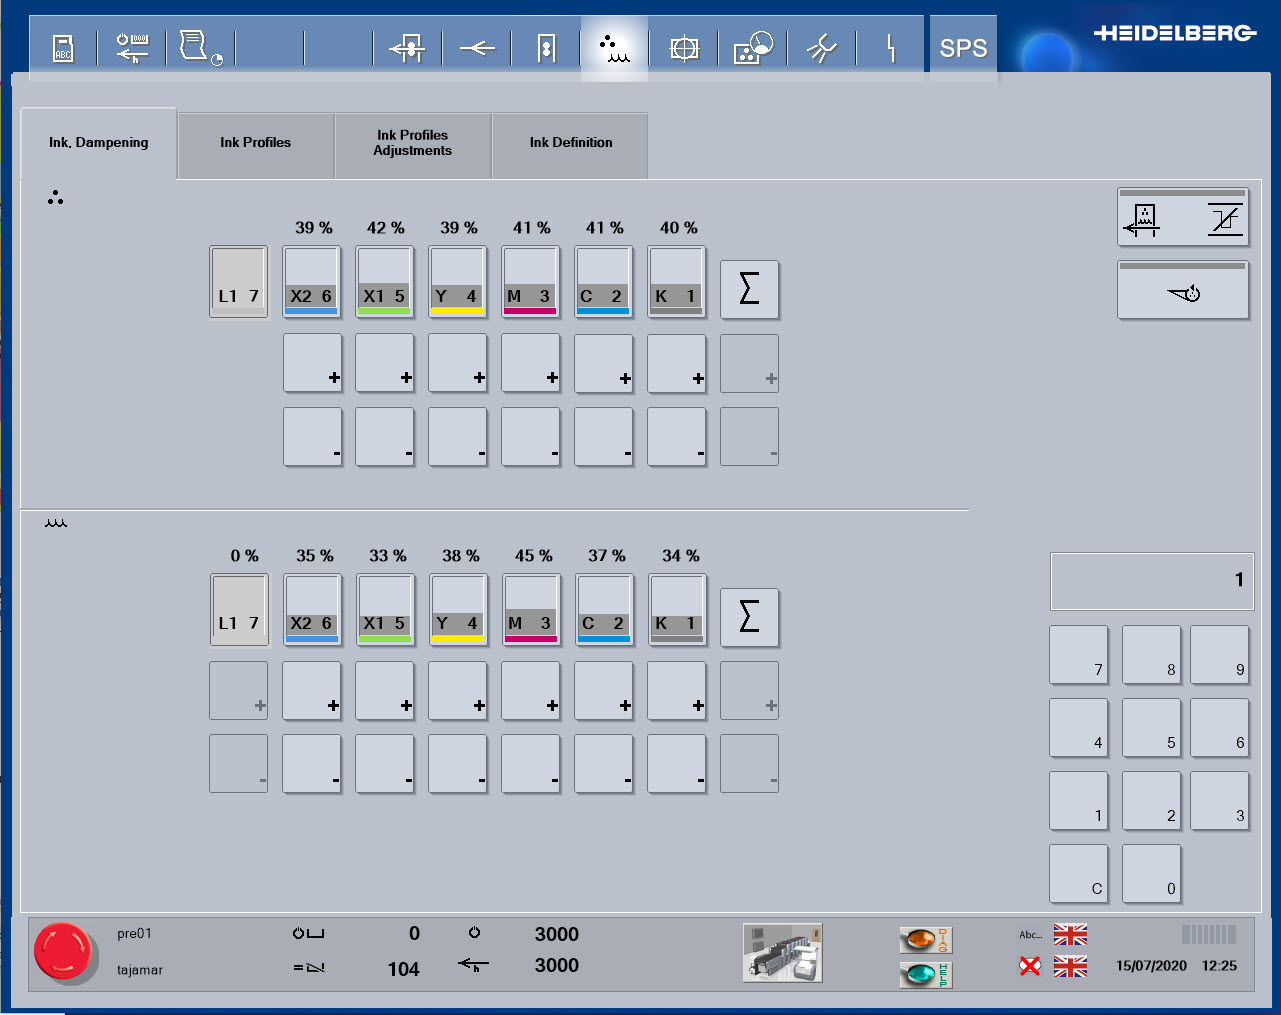
Ink and water
Ink and water balance is the principle of offset printing. For each color, you can adjust both parameters and see effect on printed copies. Use scanning densitometer to measure the color.
Simulateur Sheetfed
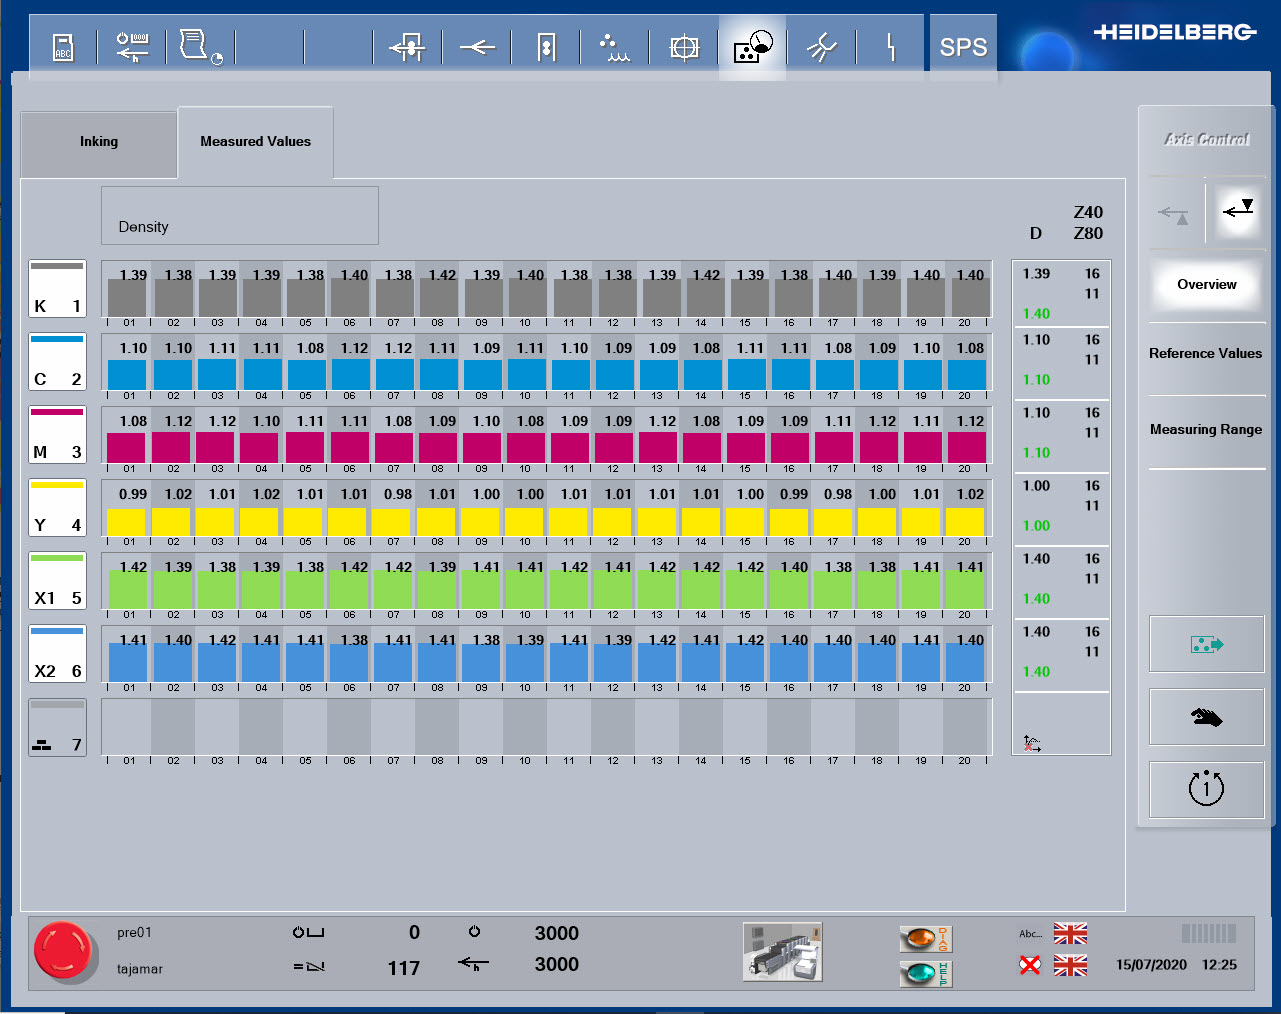
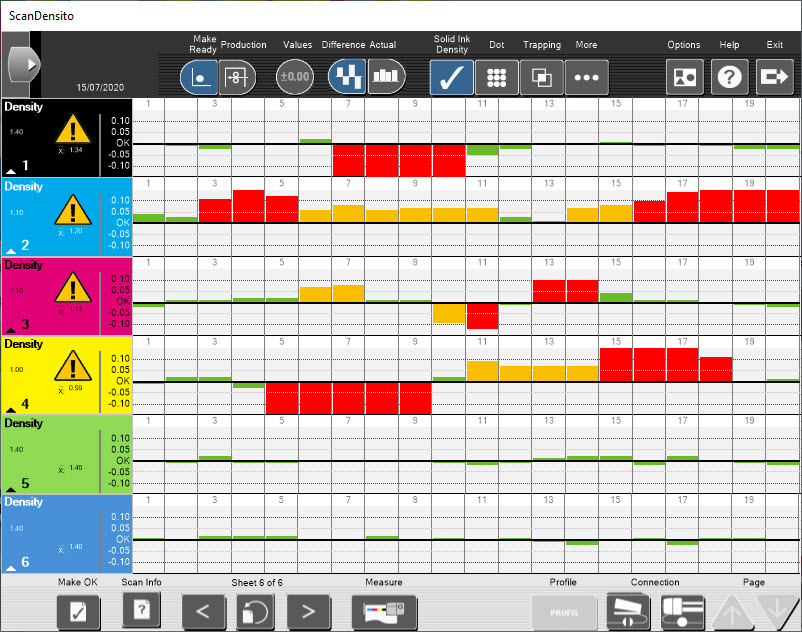
Mesure value
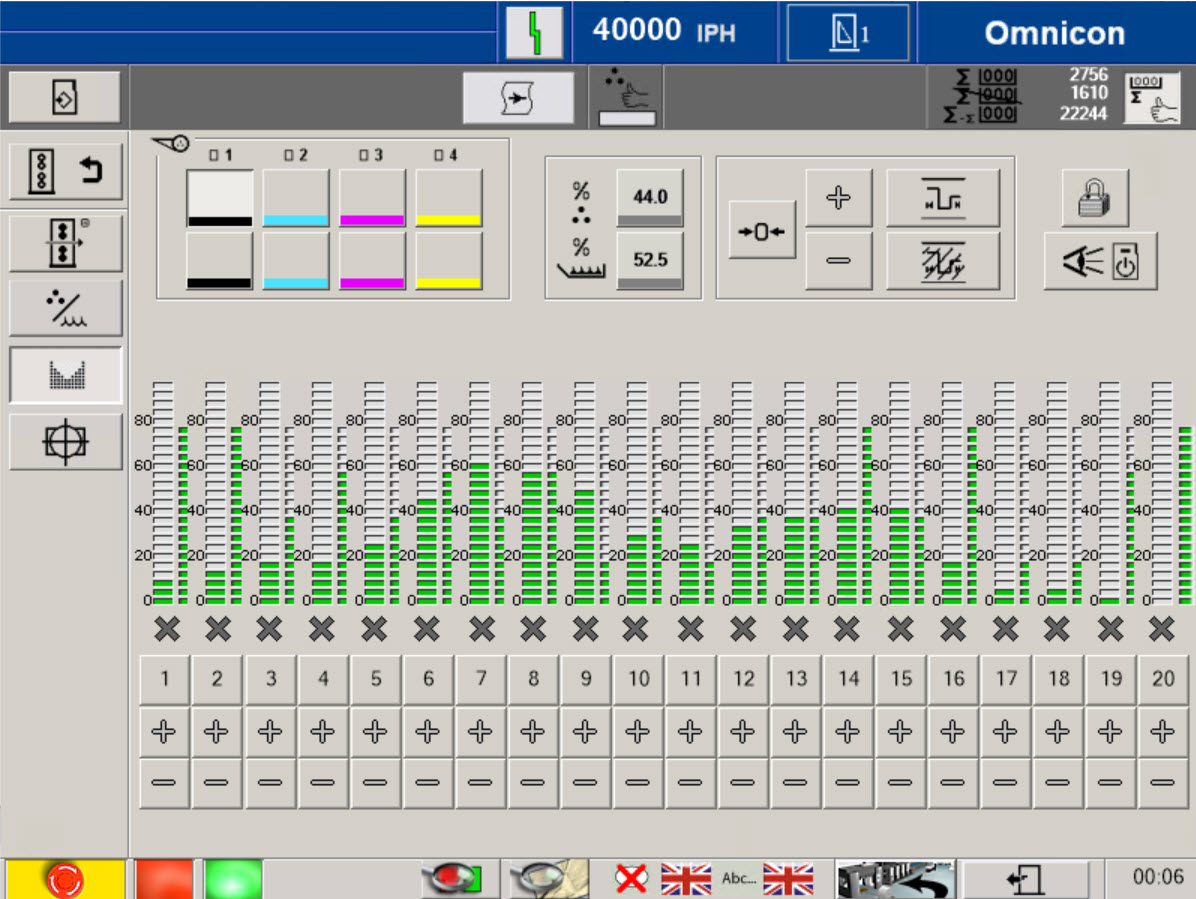
The ink keys are used to control the ink volume supplied, so that areas of high print coverage, such as solid areas have high volumes of ink delivery, whilst areas of little or no print, have minimal ink delivery.
Simulateur Sheetfed
Print and ref
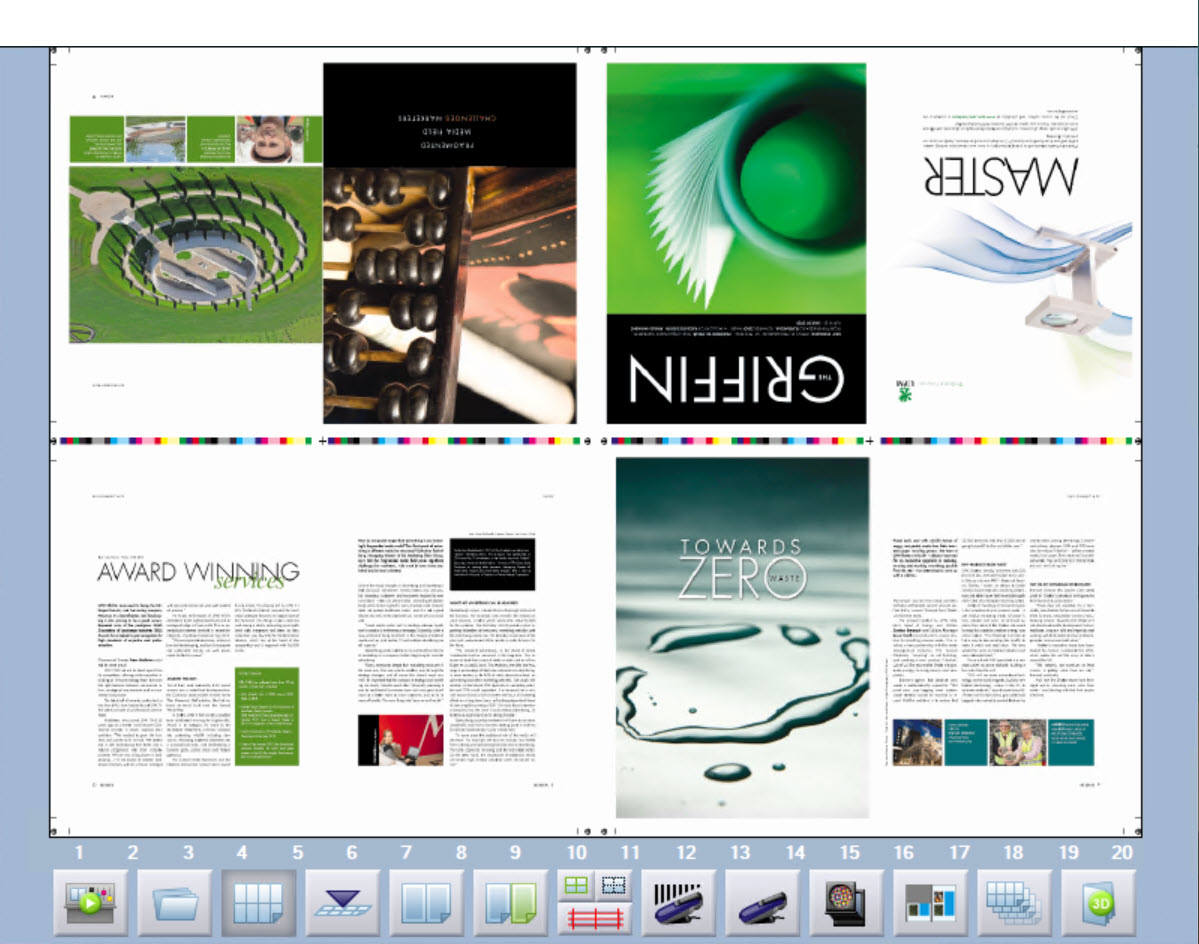
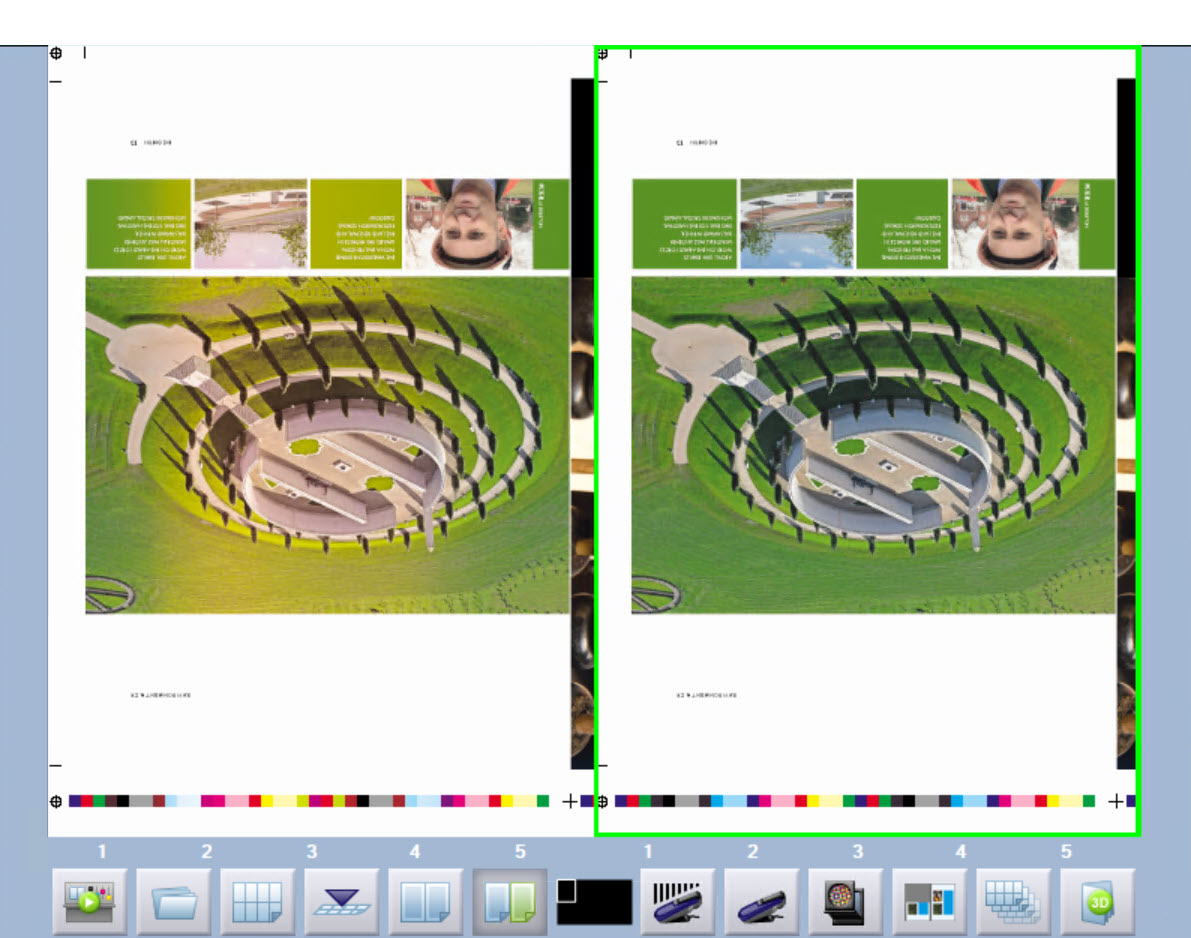
The copy desk is a key part of the simulator, not only displaying the current printed image, but allowing it to be viewed as a larger image, view both sides of the paper sheet, directly compared print copy to a color OK copy that it must match (sometimes called print proof or contract proof), and also allows the use of five essential tools to view and measure print details.
Simulateur Sheetfed
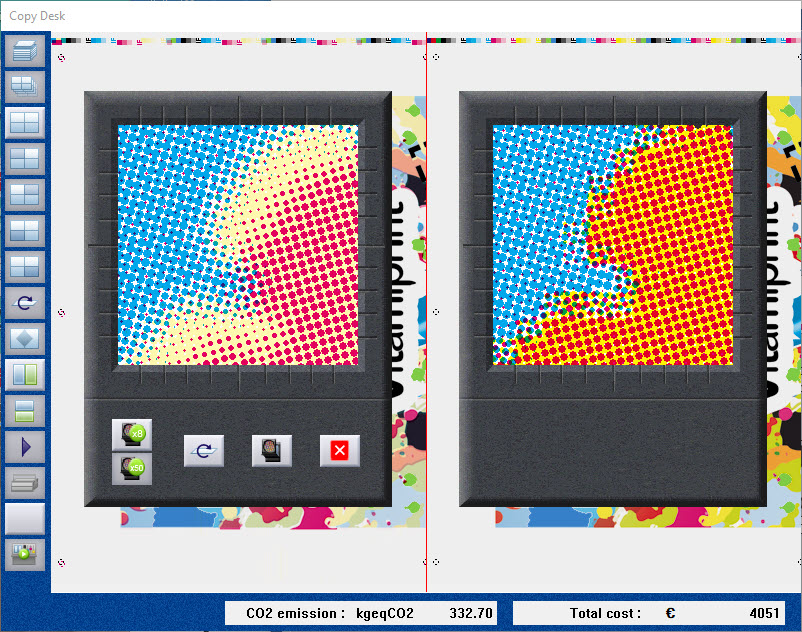
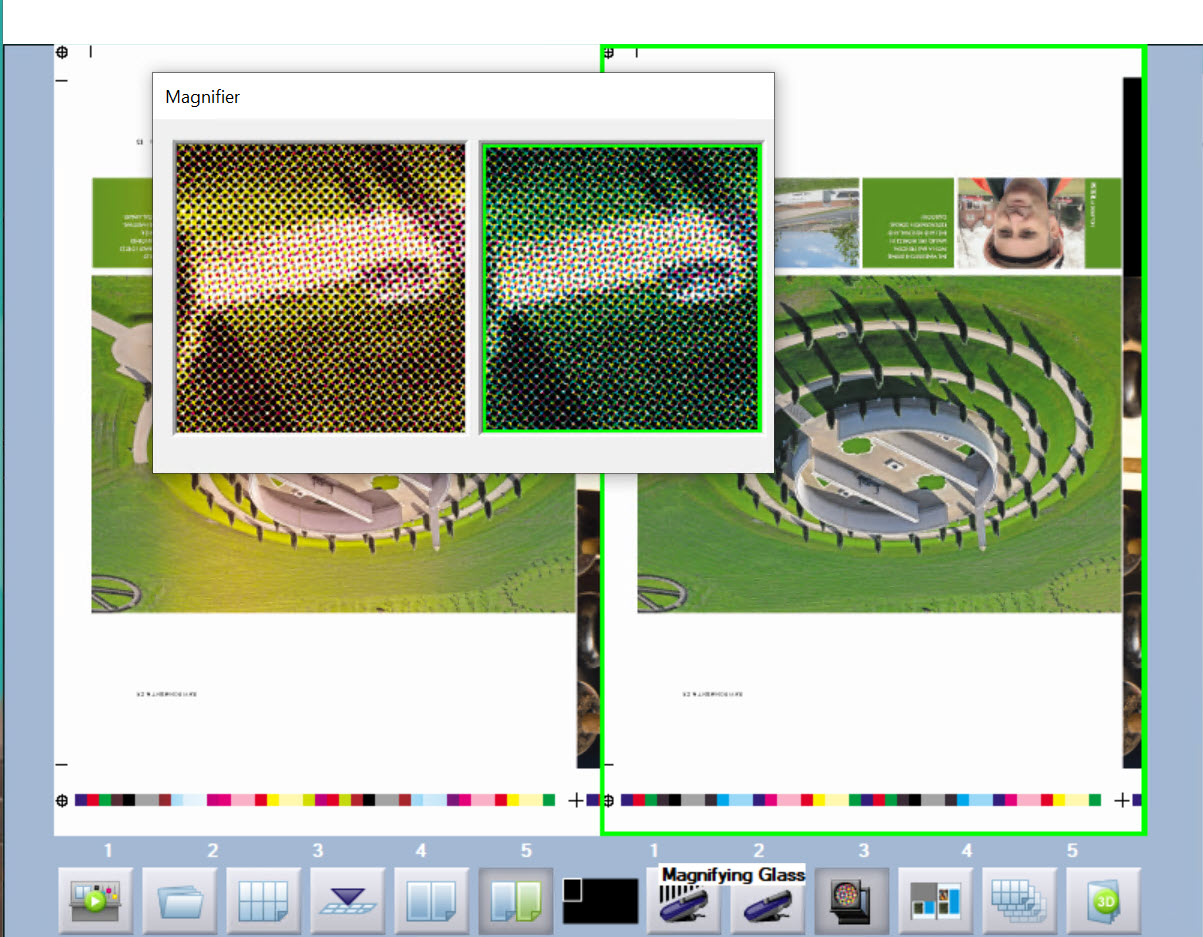
Magnifier
Registration is a key parameter in all forms of printing, and one of the most basic types of print fault.
Printing relies on the use of multiple colors in combination to make up images and colors.
They should be printed in the correct position relative to each other, for the image to be clear and sharp, with a true color reproduction.
Simulateur Sheetfed
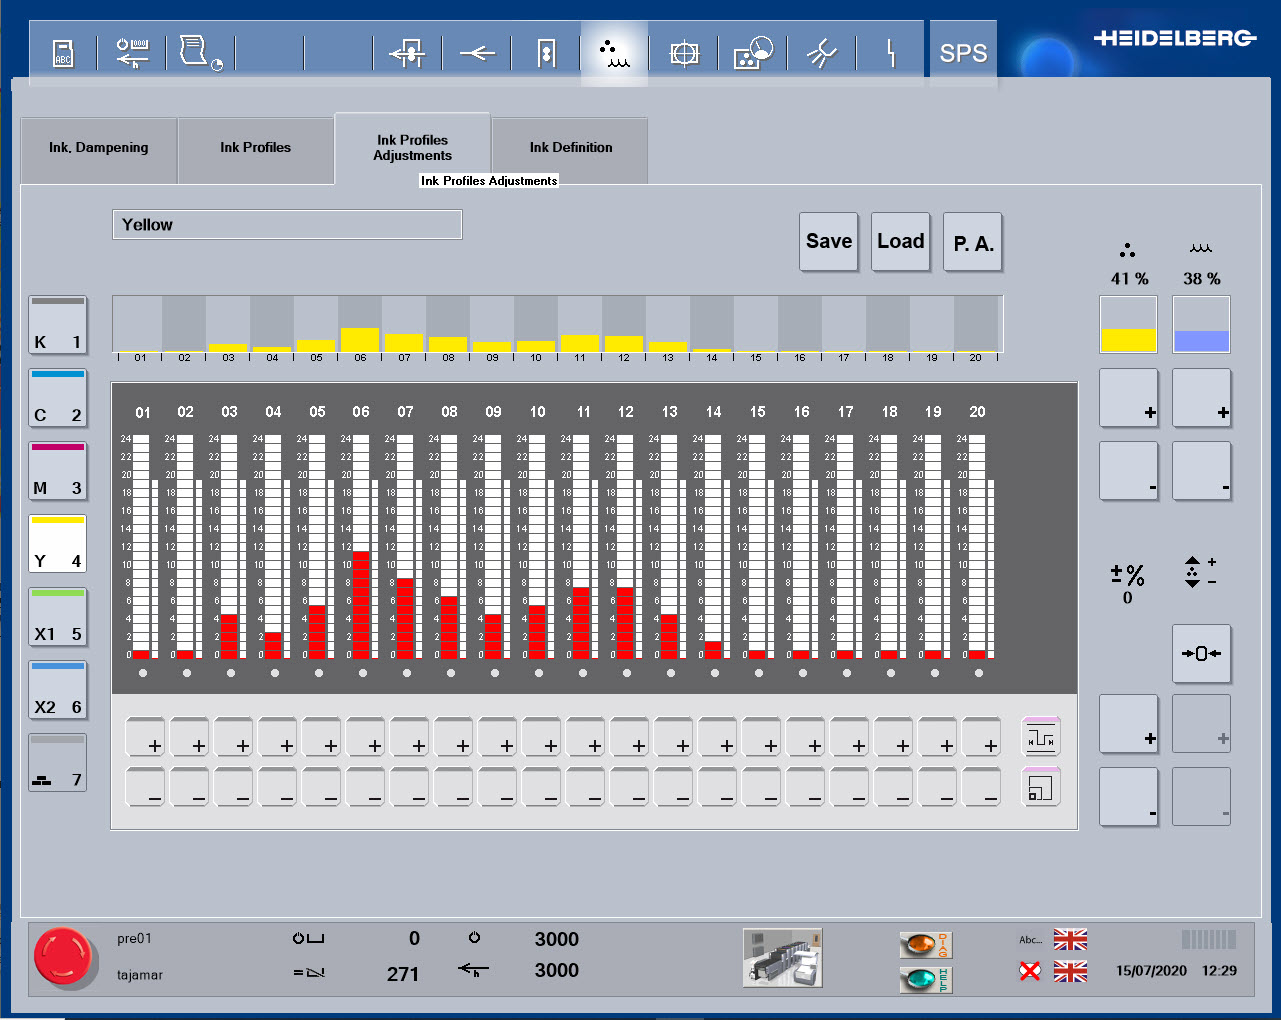
Ink profile
Like the ink levels, adjustments to the ink keys take time to make their way all the way through the inking rollers, with a latency applied, so time must be allowed for the ink changes, with best practices suggesting that smaller changes should be made each time.
Simulateur Sheetfed
Xrite
The use of densitometry is a vital function in the modern printing industry, and the use of the SHOTS simulator.
Densitometry involves the shining of a controlled standard light source onto a sample and measurement of the reflected light that is received through specific filters by the measurement head.
Simulateur Sheetfed
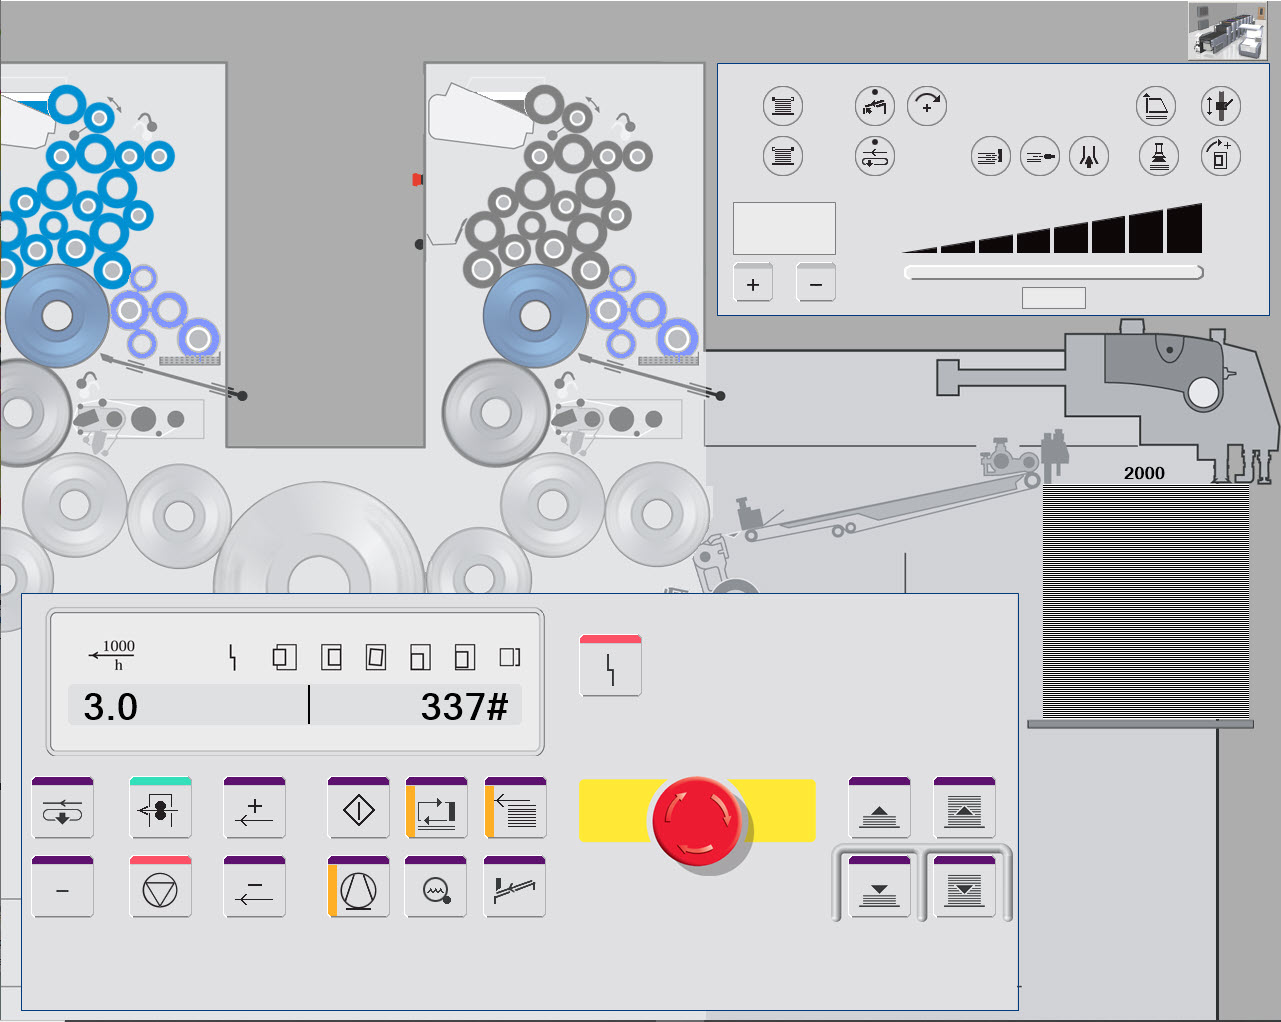
Feeder
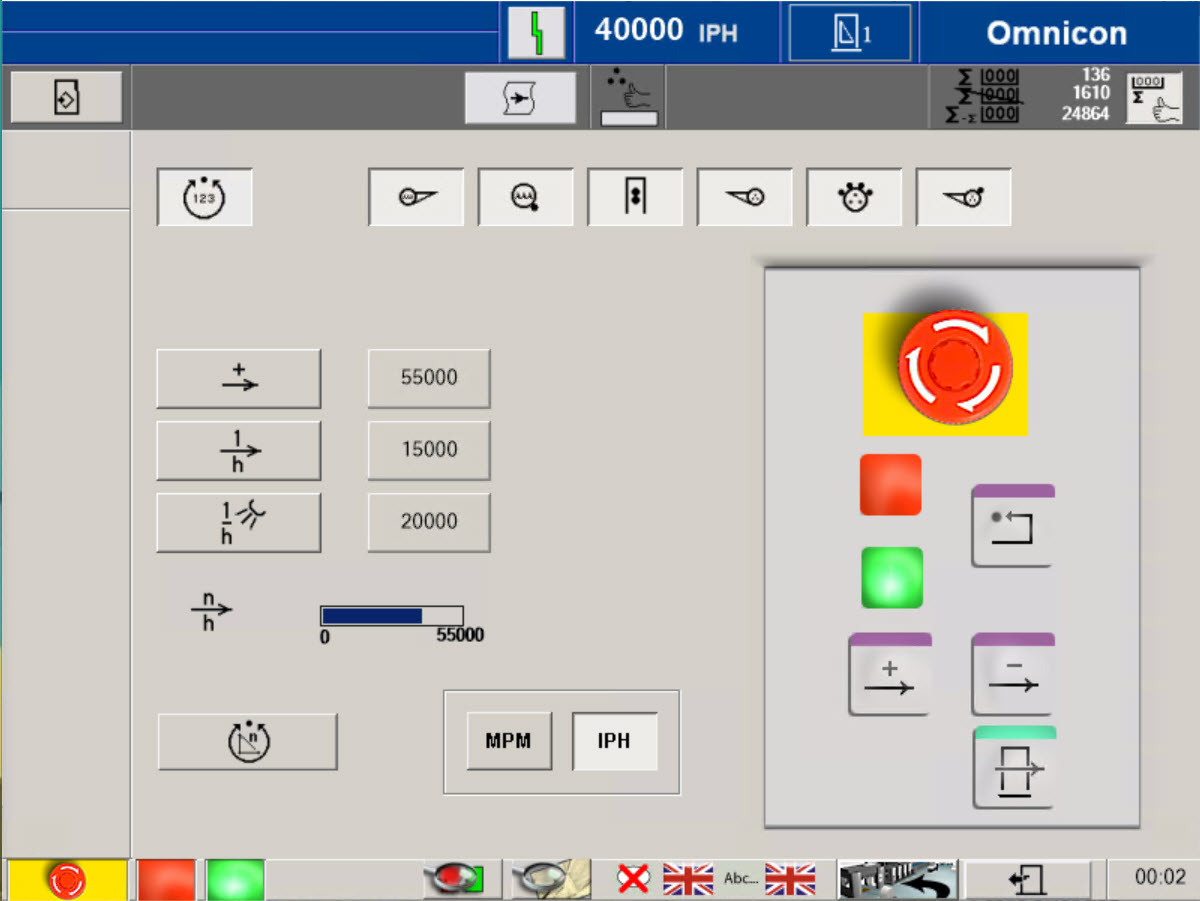
Follow sequence of buttons to start the press. Push ON button 2 times to speed up the press. The, start the feeder and turn the compressor ON
Select Paper Run button to engage poper and production to print.
Simulateur Sheetfed
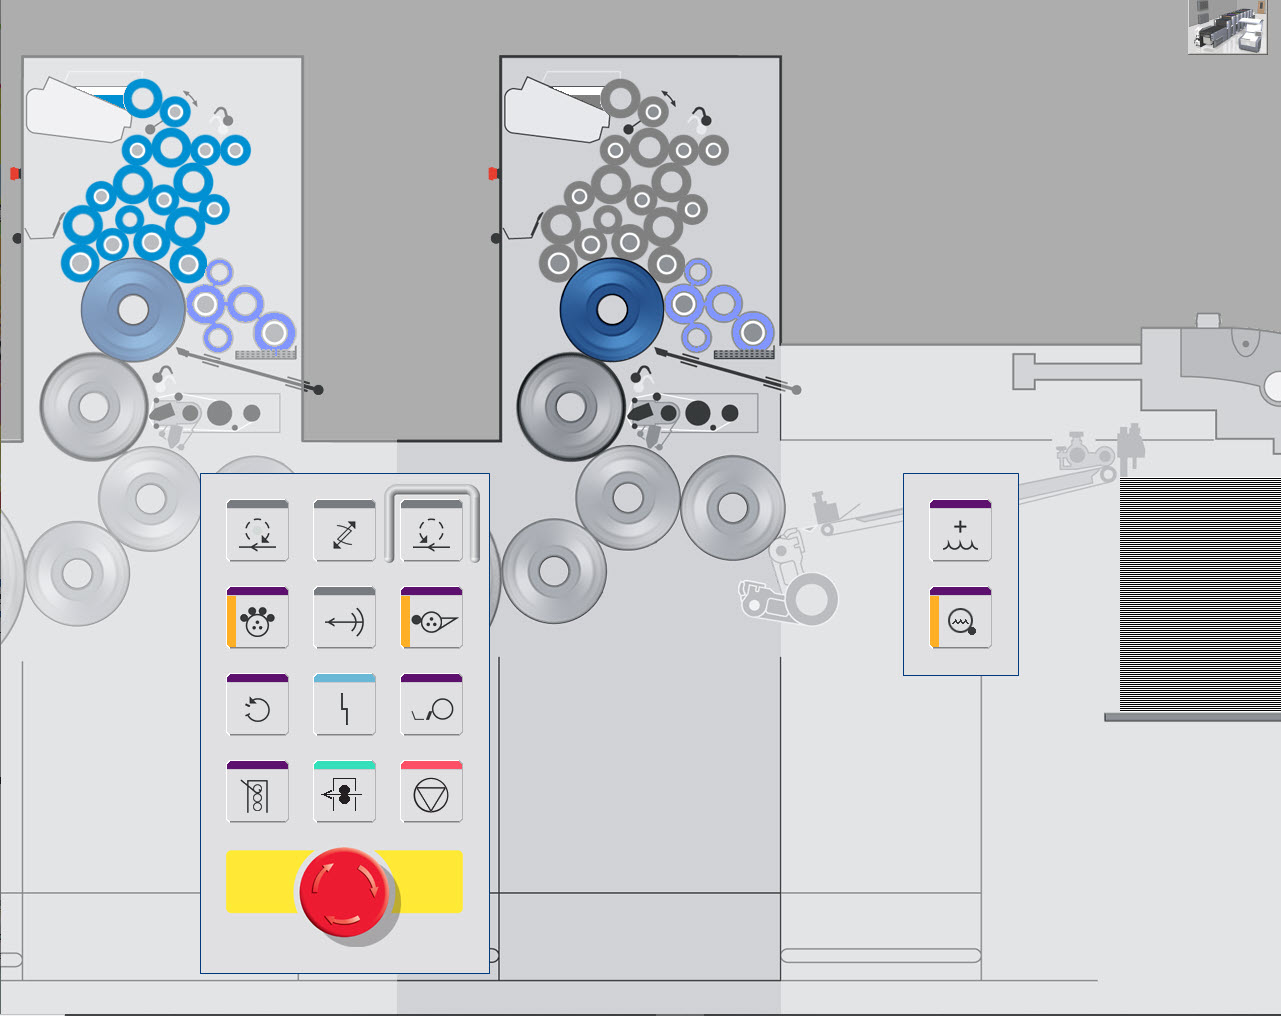
Print unit
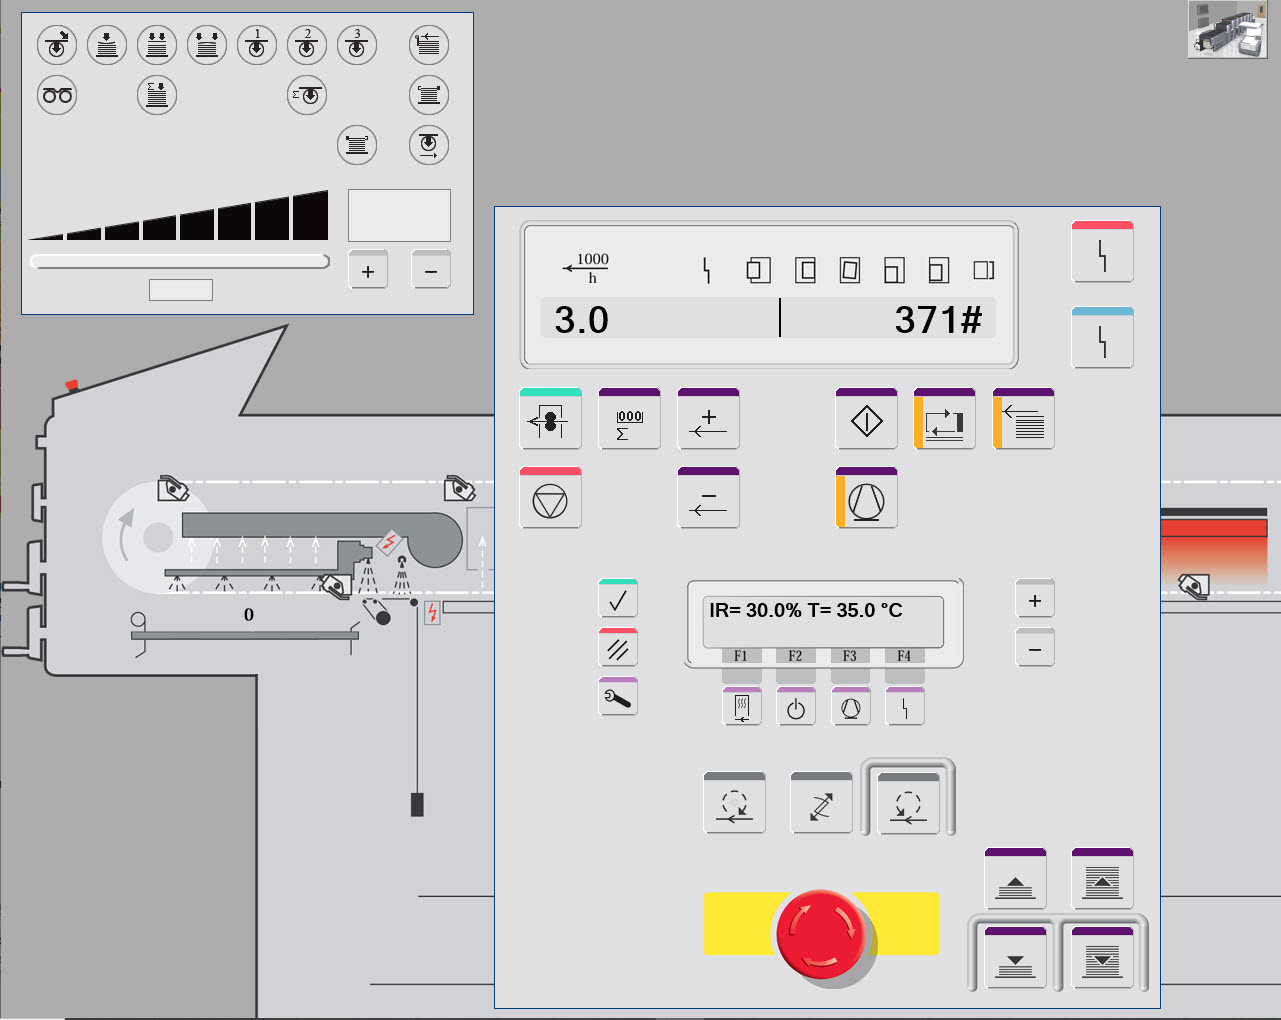
This view shows two control panels and a schematic of the printing unit in the middle.
Note the color of the ink at the top of the print unit matches the ink currently in use.
Simulateur Sheetfed
Delivery
At the delivery unit, you can manage press operation and adjust dryer.
Heatset Simulator
Access press
From the pressroom, you have access to a press capable of printing up to 4 colors top and bottom side, producing 16 pages folded.
The central console is a control system with different screens, each controlling different simulator functions.
Heatset Simulator
Start screen
From the "start panel" screen, you can start the press and go to the copy desk to get a new print copy.
Heatset Simulator
Print copy
The copy desk is the place in the simulator to collect and view the printed images.
Just like on a real press, each time changes are made, a new print must be produced, and a new print copy collected to view.
Heatset Simulator
Print function
Press configuration in terms of whether a print unit is engaged or off can be checked here.
A basic check for press function is to check that all of the print units required are switched on, remember this for the following exercises.
Heatset Simulator
Ink and water
Ink and water balance is the principle of offset printing. For each color, you can adjust both parameters and see effect on printed copies. Use scanning densitometer to measure the color.
Heatset Simulator
Mesure value
The ink keys are used to control the ink volume supplied, so that areas of high print coverage, such as solid areas have high volumes of ink delivery, whilst areas of little or no print, have minimal ink delivery.
Heatset Simulator
Print and ref
The copy desk is a key part of the simulator, not only displaying the current printed image, but allowing it to be viewed as a larger image, view both sides of the paper sheet, directly compared print copy to a color OK copy that it must match (sometimes called print proof or contract proof), and also allows the use of tools to view and measure print details.
Heatset Simulator
Magnifier
Registration is a key parameter in all forms of printing, and one of the most basic types of print fault.
Printing relies on the use of multiple colors in combination to make up images and colors.
They should be printed in the correct position relative to each other, for the image to be clear and sharp, with a true color reproduction.
Heatset Simulator
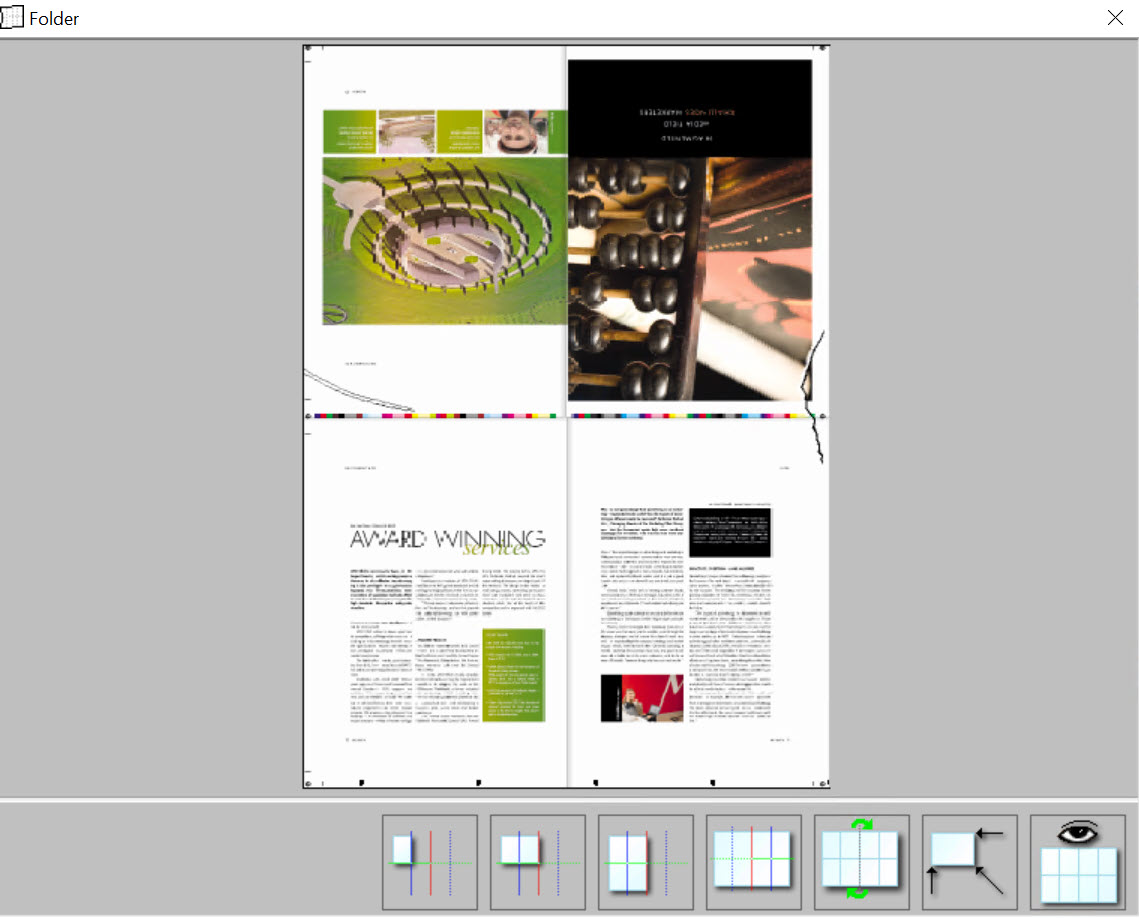
Folder problem
Like the ink levels, adjustments to the ink keys take time to make their way all the way through the inking rollers, with a latency applied, so time must be allowed for the ink changes, with best practices suggesting that smaller changes should be made each time.
Heatset Simulator
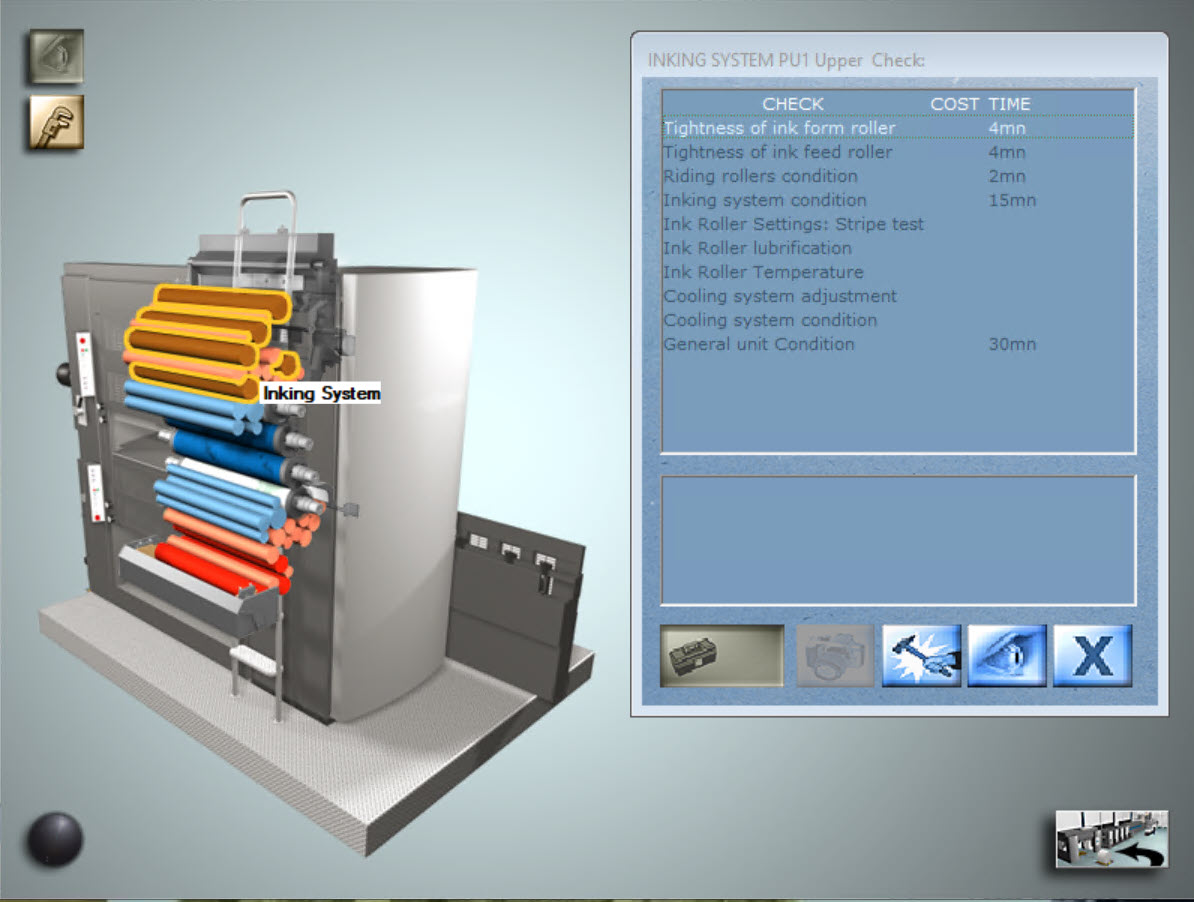
Print unit
This view shows two control panels and a schematic of the printing unit in the middle.
Note the color of the ink at the top of the print unit matches the ink currently in use.

Heatset Simulator
Dryer
At the delivery unit, you can manage press operation and adjust dryer.
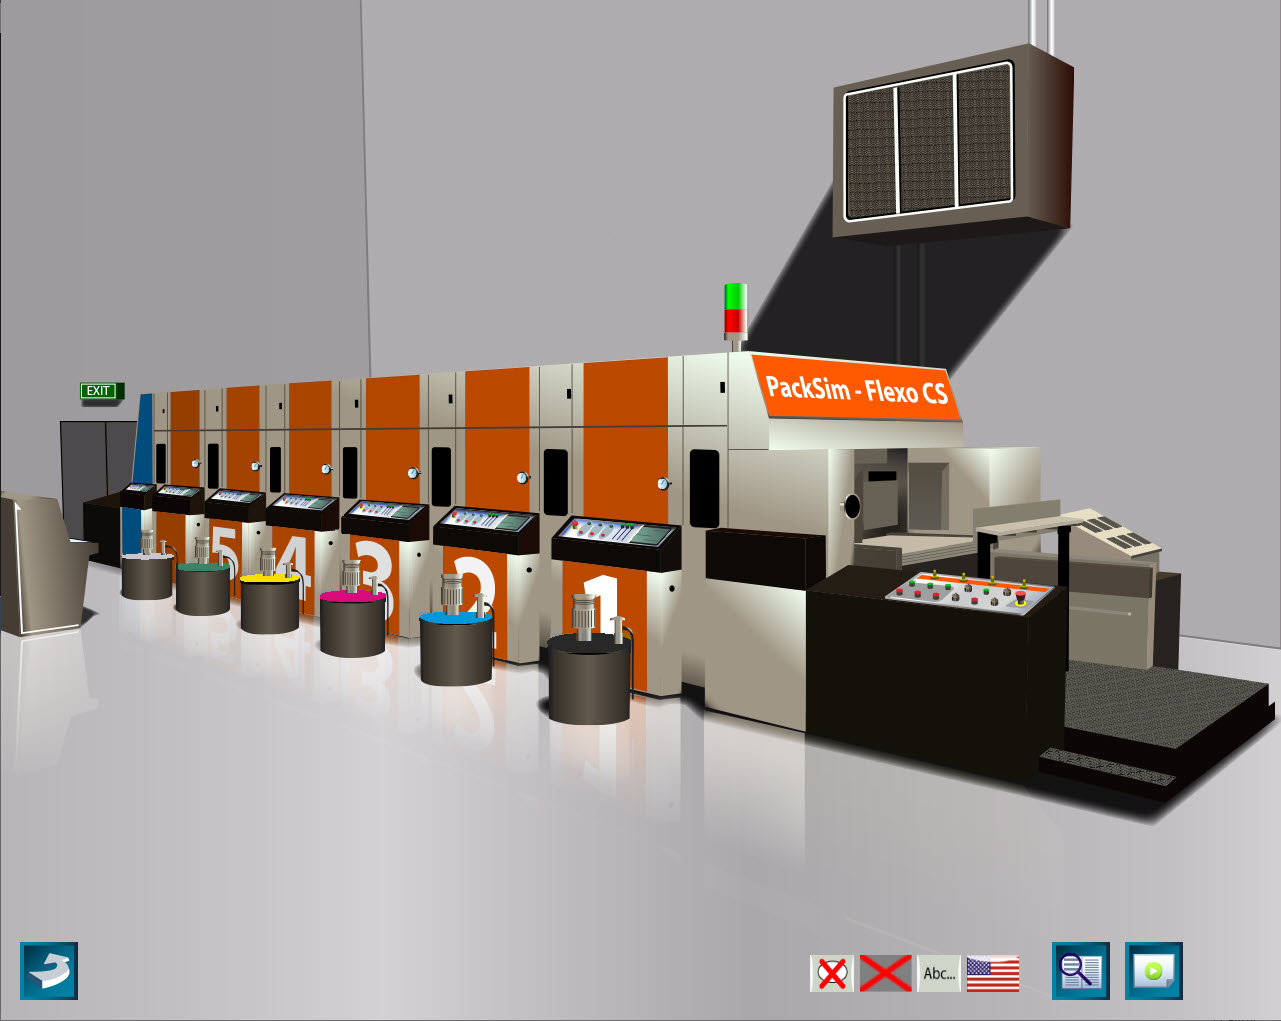
Flexo Simulator
Access press
From the pressroom, you have access to a press capable of printing up to 8 colors in a single pass of the paper through it.
The central console is a control system with 8 screens, each controlling different simulator functions.
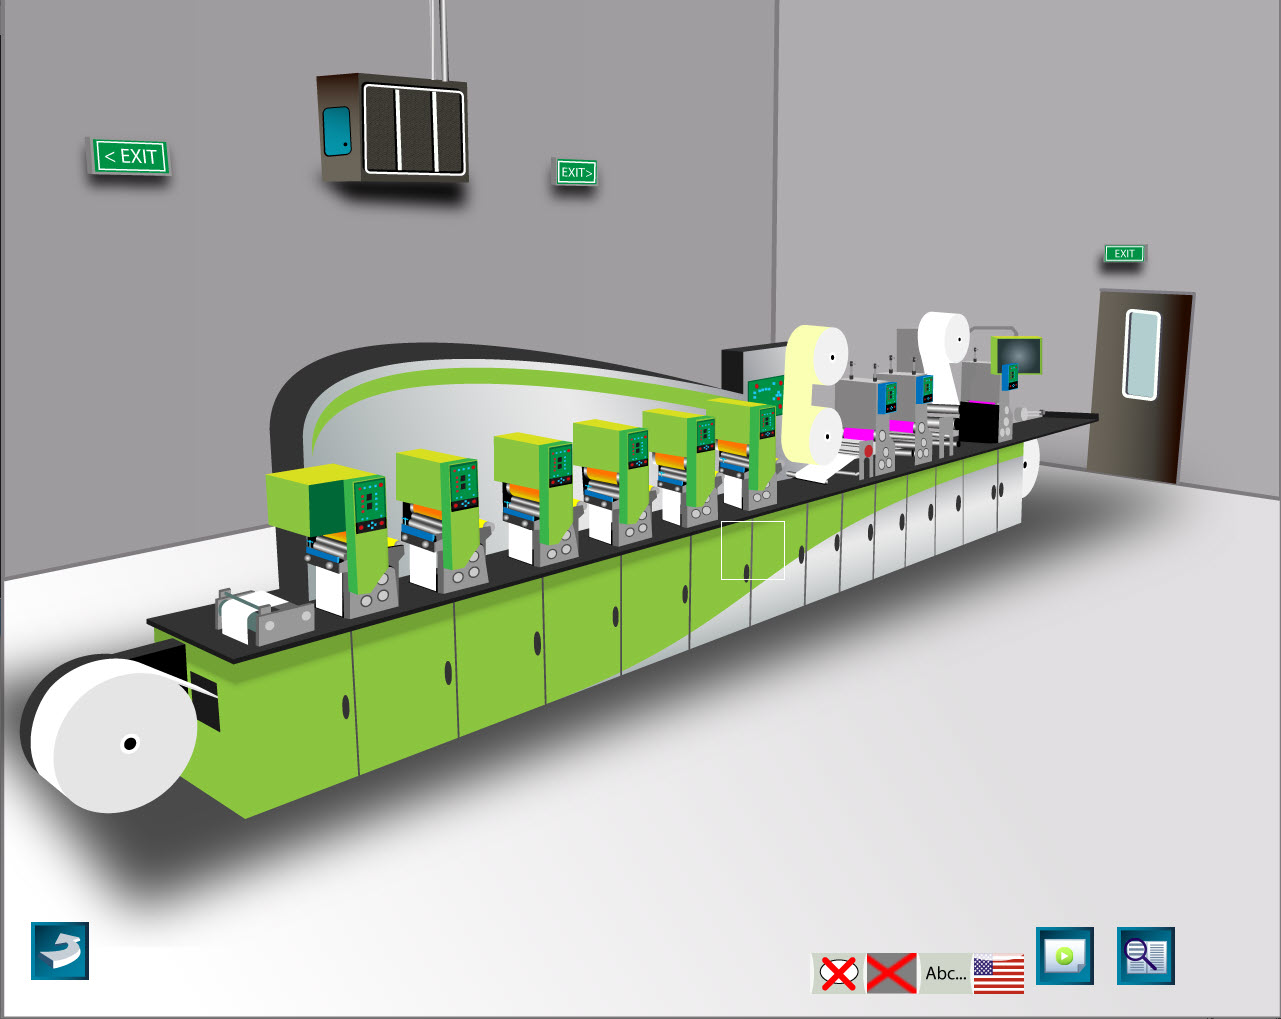
Flexo Simulator
Access press
From the pressroom, you have access to a press capable of printing up to 8 colors in a single pass of the paper through it.
The central console is a control system with 6 screens, each controlling different simulator functions.
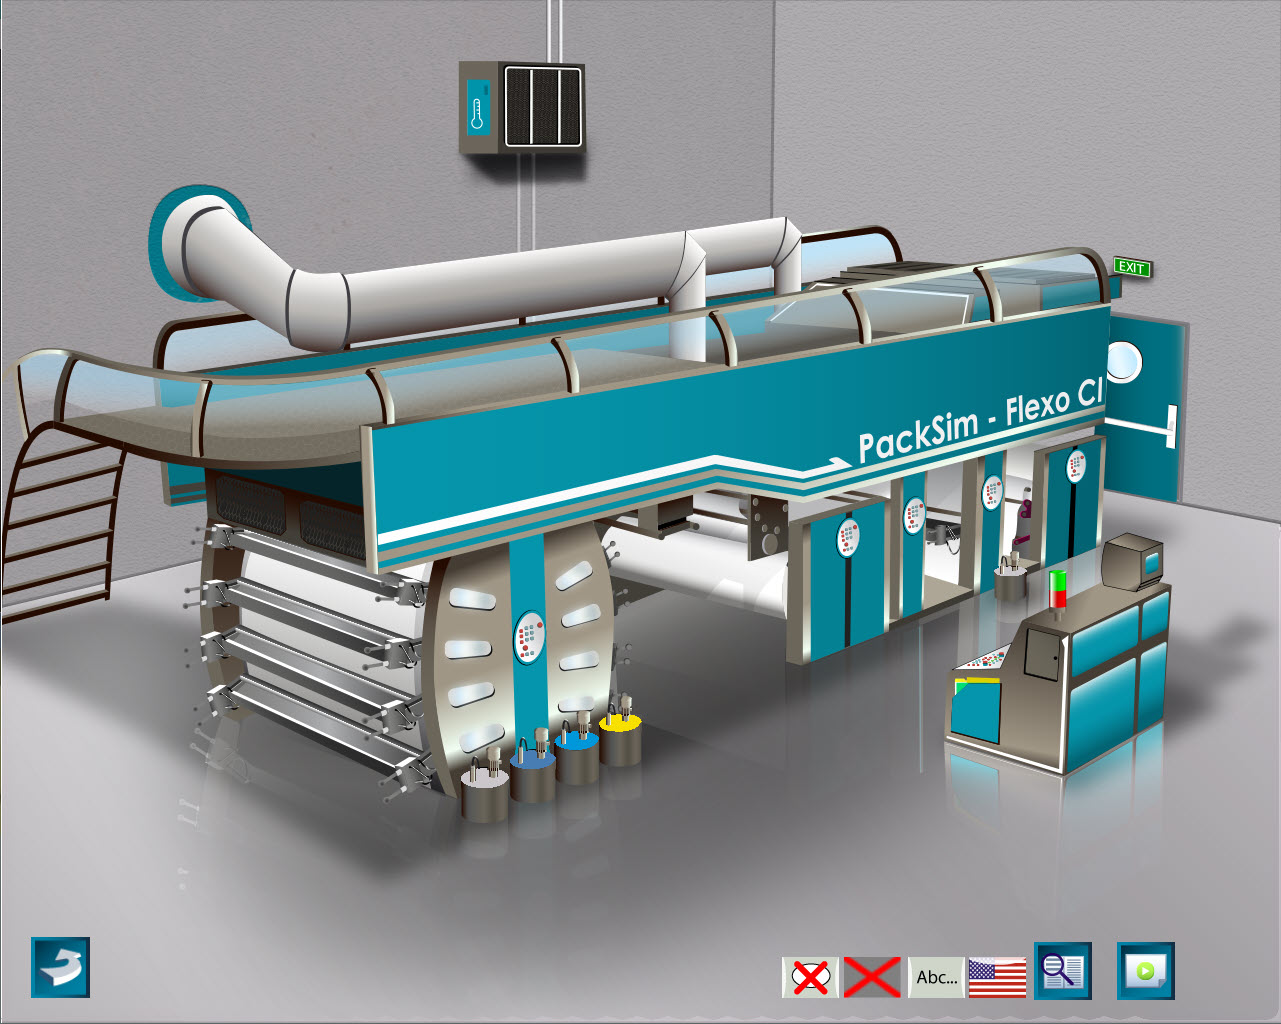
Flexo Simulator
Access press
From the pressroom, you have access to a press capable of printing up to 6 colors in a single pass of the paper through it.
The central console is a control system with 8 screens, each controlling different simulator functions.
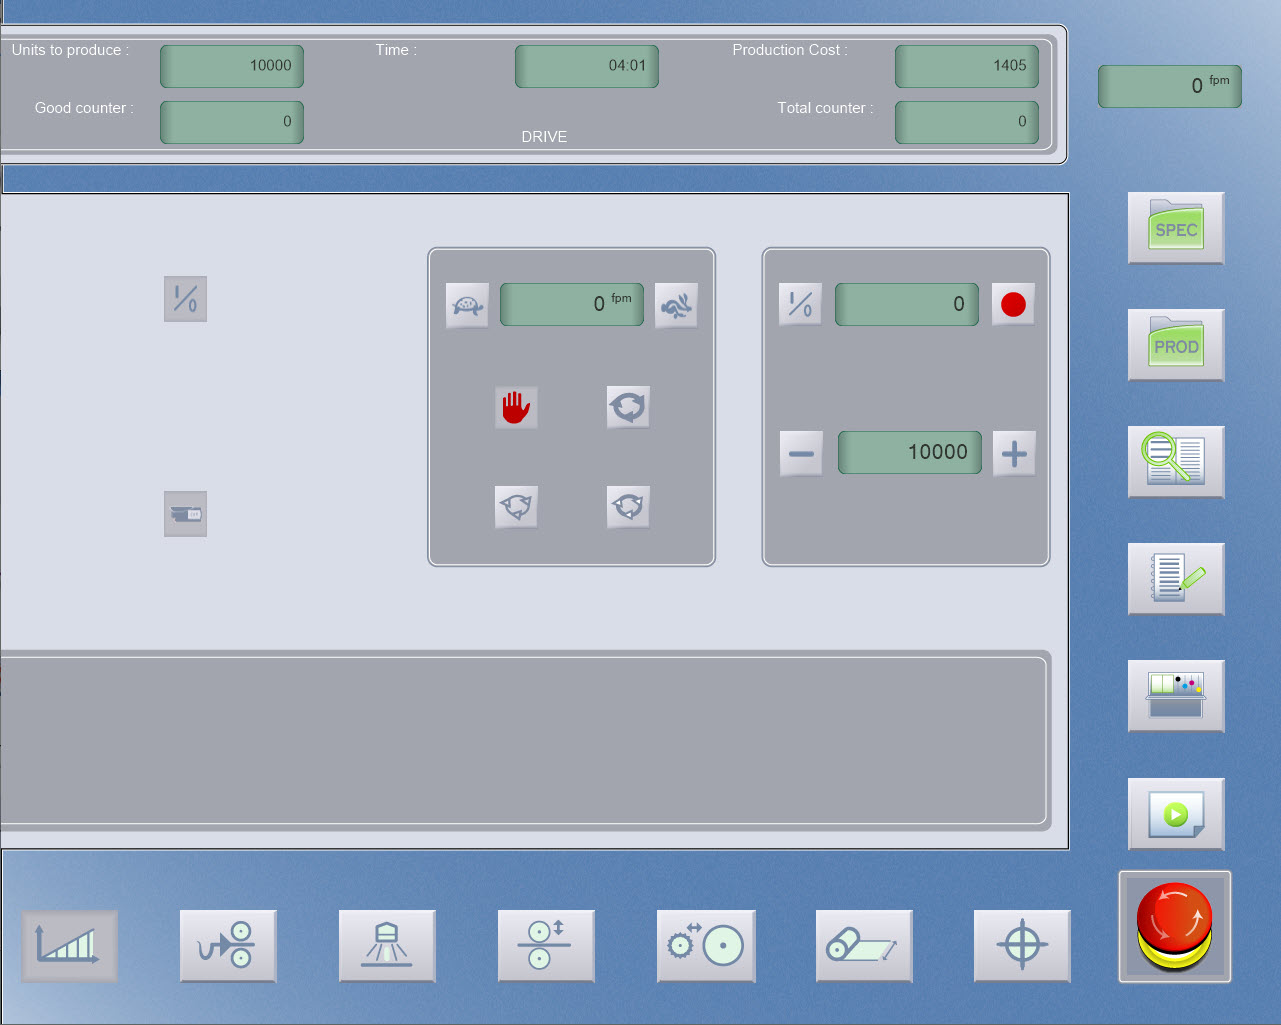
Flexo Simulator
Start screen
From the "start panel" screen, you can start the press and go to the copy desk to get a new print copy.
Flexo Simulator
Print copy
The copy desk is the place in the simulator to collect and view the printed images.
Just like on a real press, each time changes are made, a new print must be produced, and a new print copy collected to view.
Flexo Simulator
Print overview
Press configuration in terms of whether a print unit is engaged or off can be checked here.
A basic check for press function is to check that all of the print units required are switched on, remember this for the following exercises.
Flexo Simulator
Print and ref
The copy desk is a key part of the simulator, not only displaying the current printed image, but allowing it to be viewed as a larger image, view both sides of the paper sheet, directly compared print copy to a color OK copy that it must match (sometimes called print proof or contract proof), and also allows the use of five essential tools to view and measure print details.
Flexo Simulator
Magnifier
Registration is a key parameter in all forms of printing, and one of the most basic types of print fault.
Printing relies on the use of multiple colors in combination to make up images and colors.
They should be printed in the correct position relative to each other, for the image to be clear and sharp, with a true color reproduction.
Flexo Simulator
Ink tank
Like the ink levels, adjustments to the ink keys take time to make their way all the way through the inking rollers, with a latency applied, so time must be allowed for the ink changes, with best practices suggesting that smaller changes should be made each time.
Flexo Simulator
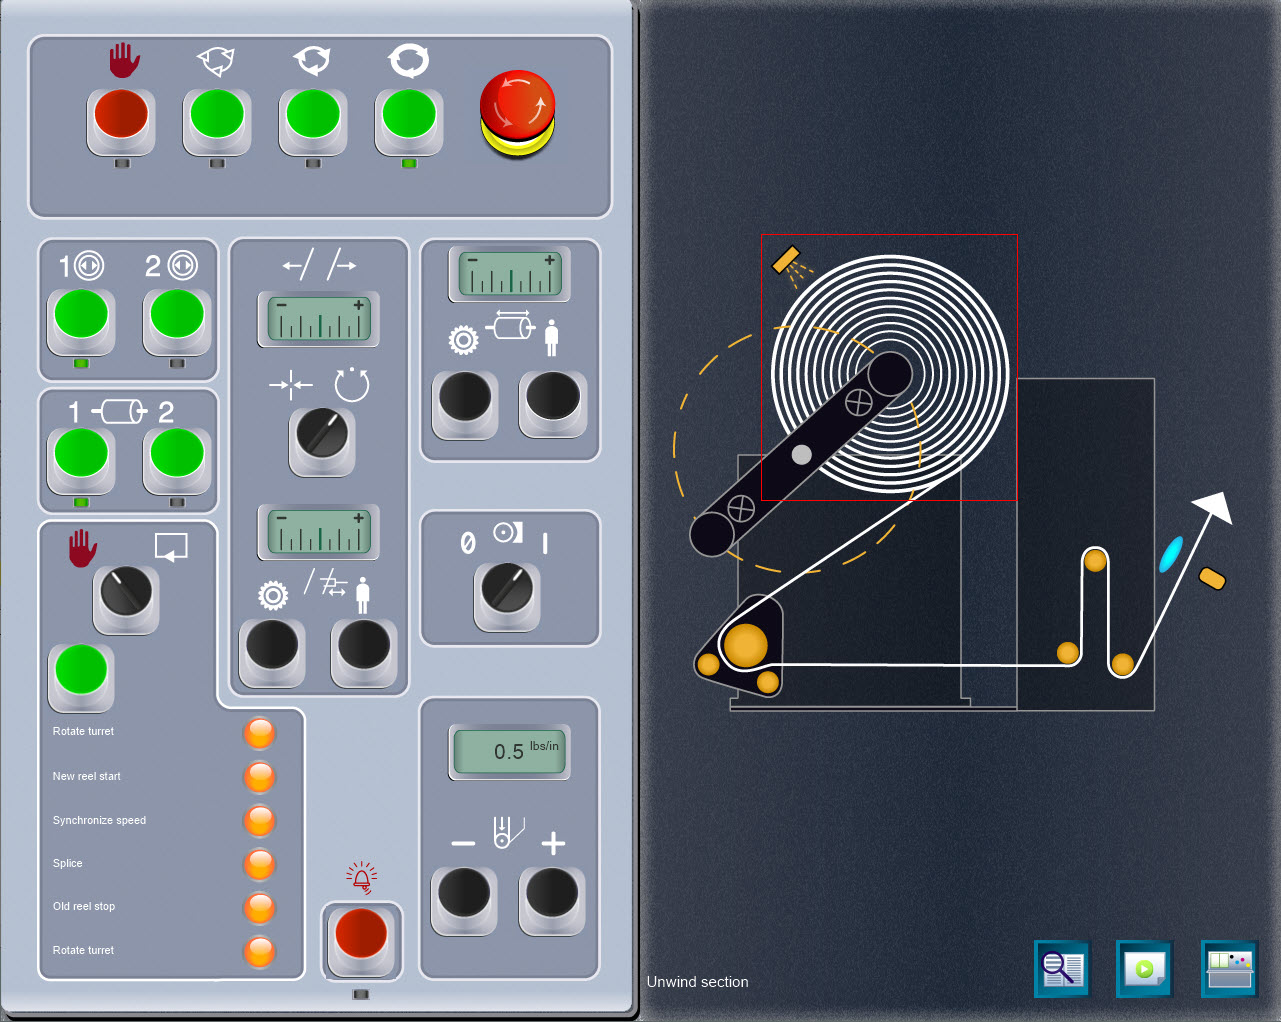
Feeder
Follow sequence of buttons to start the press. Push ON button 2 times to speed up the press. The, start the feeder and turn the compressor ON
Select Paper Run button to engage paper and production to print.
Flexo Simulator
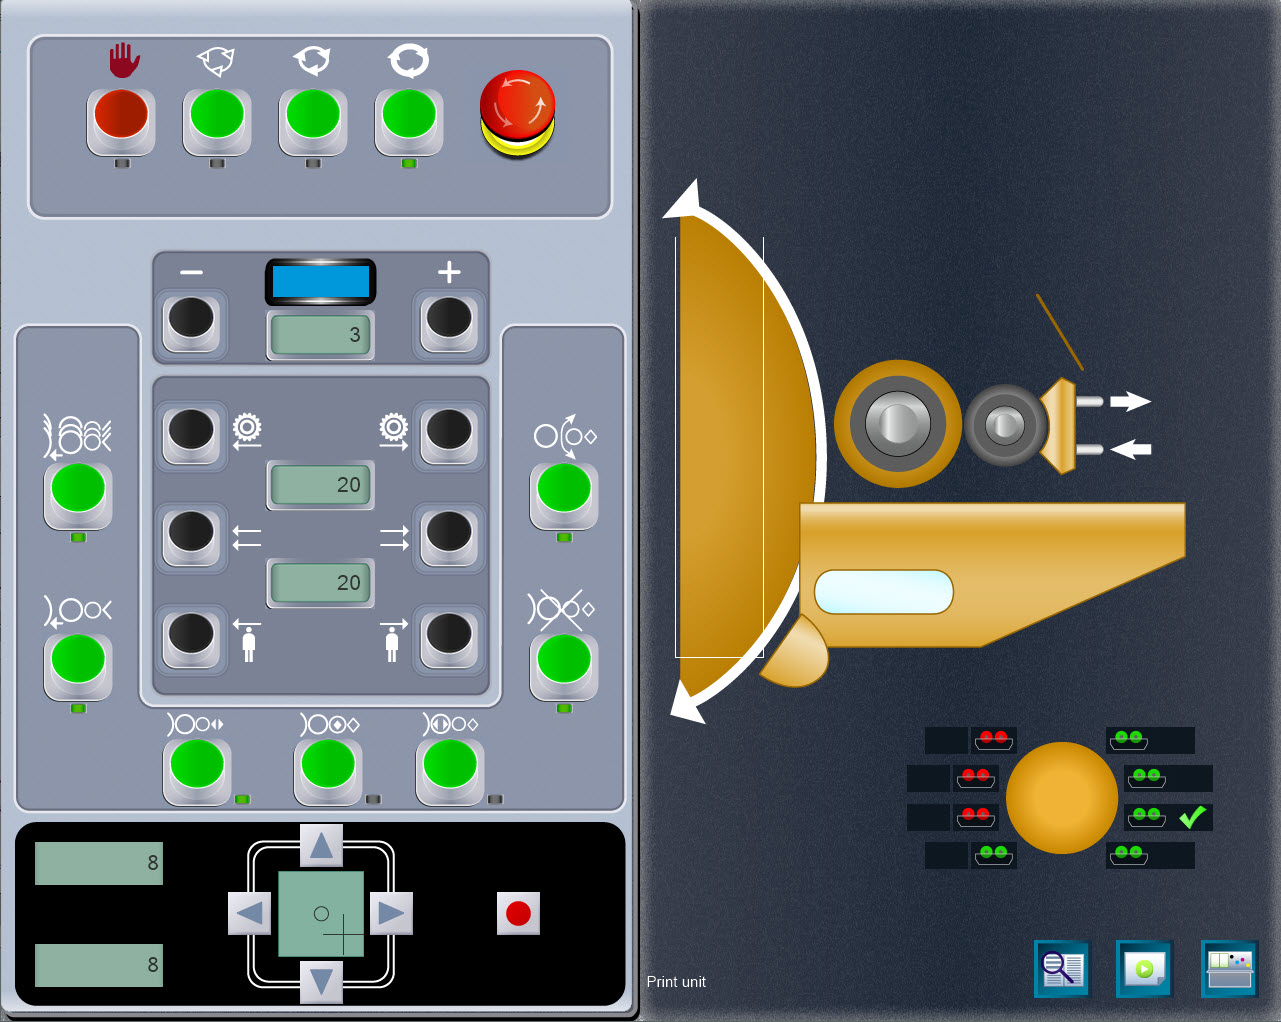
Print unit
This view shows two control panels and a schematic of the printing unit in the middle.
Note the color of the ink at the top of the print unit matches the ink currently in use.
Gravure Simulator
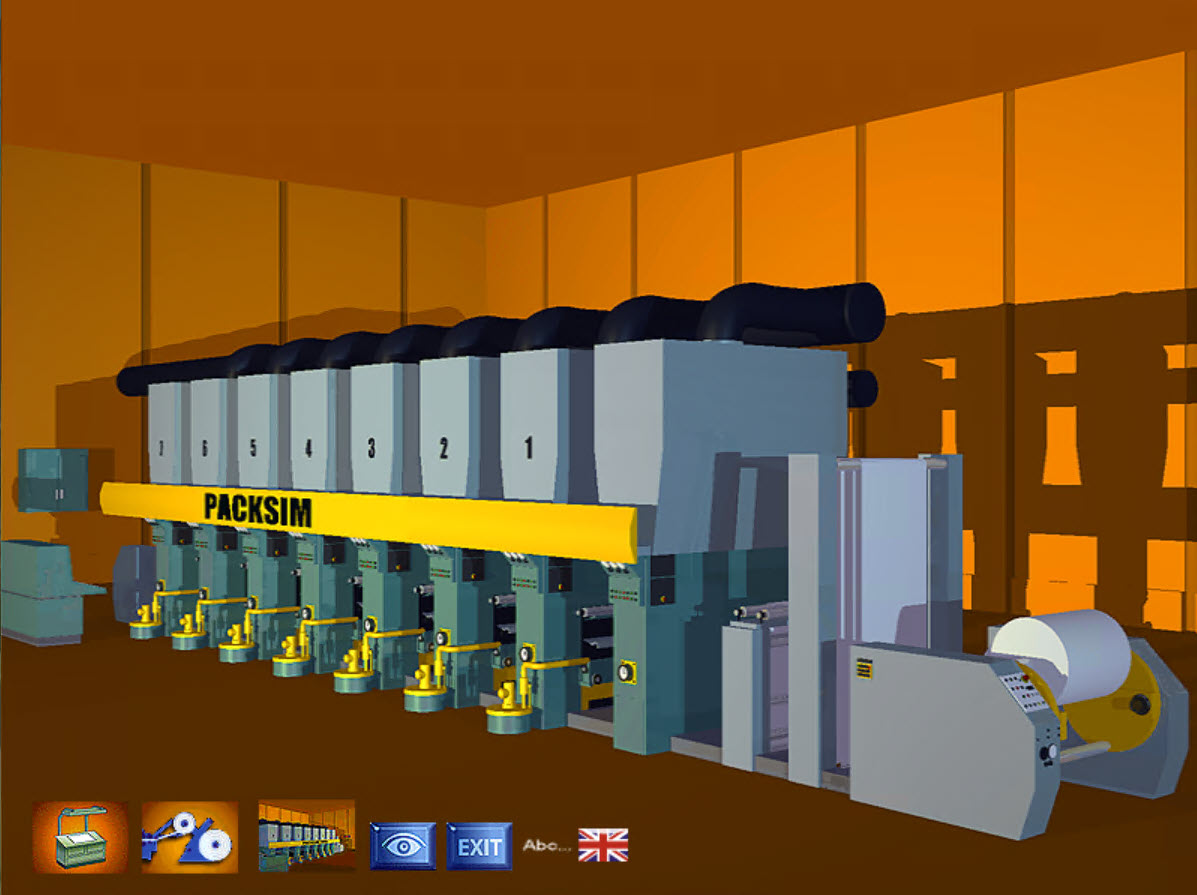
Access press
From the pressroom, you have access to a press capable of printing up to 8 colors on reel to reel or cutter creaser configuration.
The central console is a control system with 7 screens, each controlling different simulator functions.
Gravure Simulator
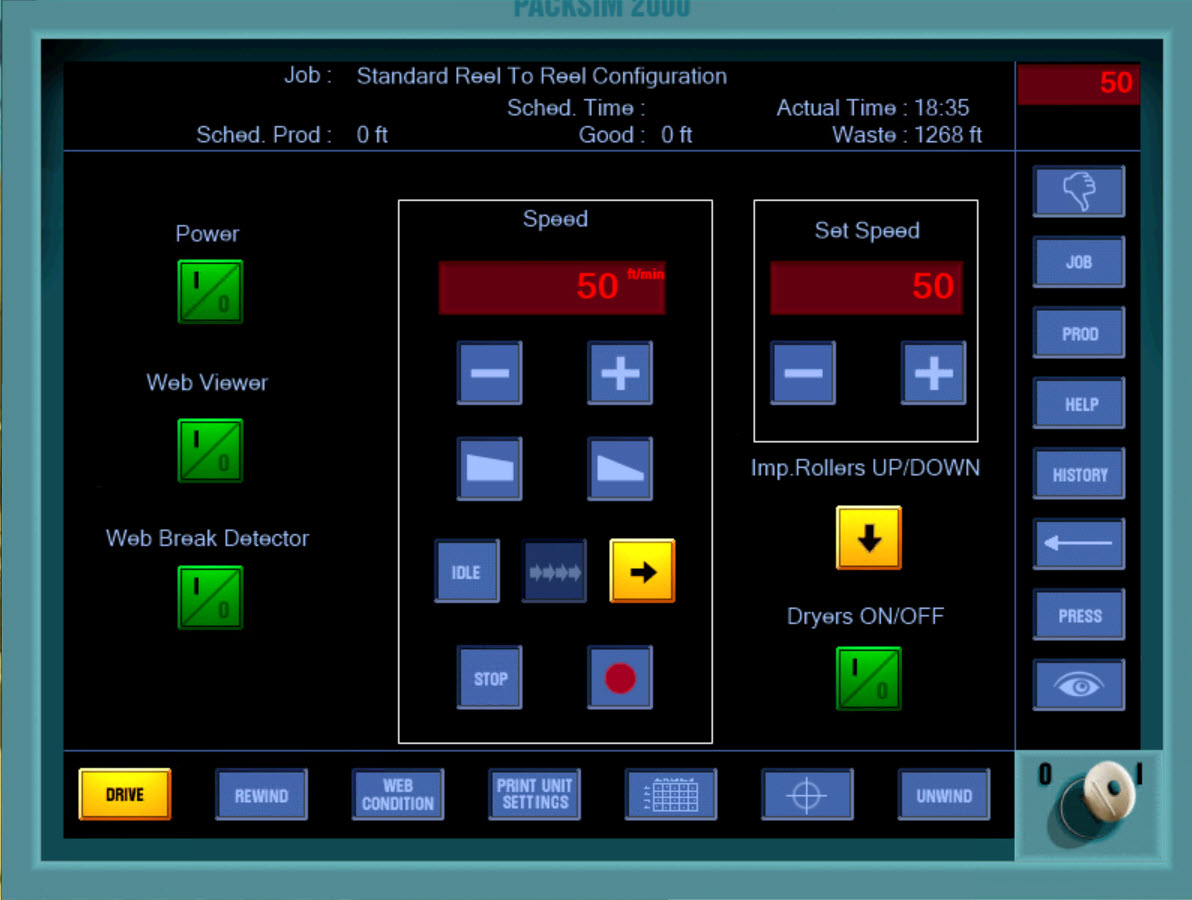
Start screen
From the "drive panel" screen, you can start the press and go to the copy desk to get a new print copy.
Gravure Simulator
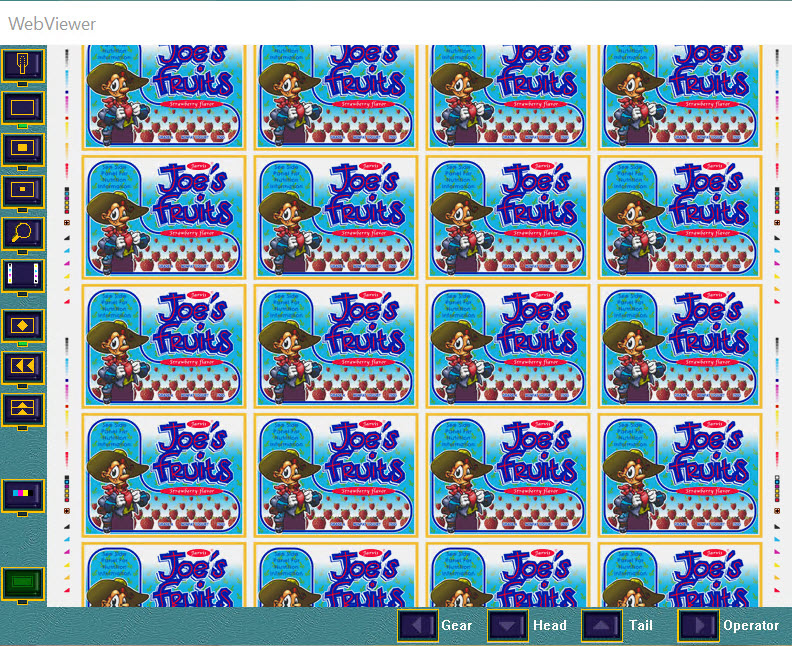
Print copy
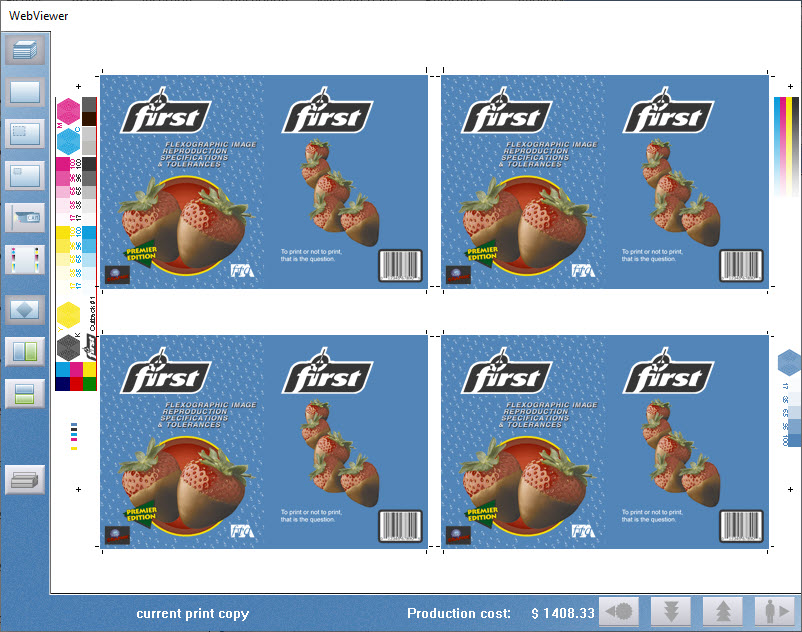
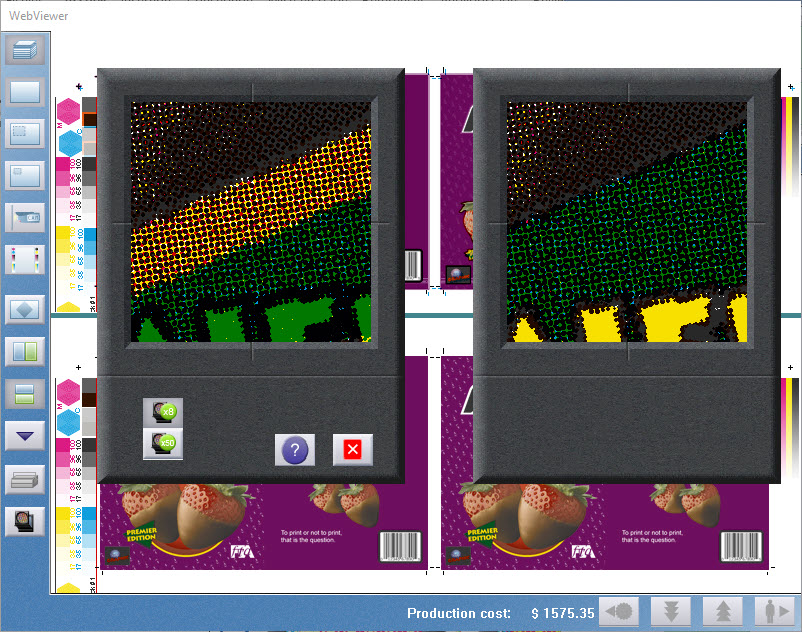
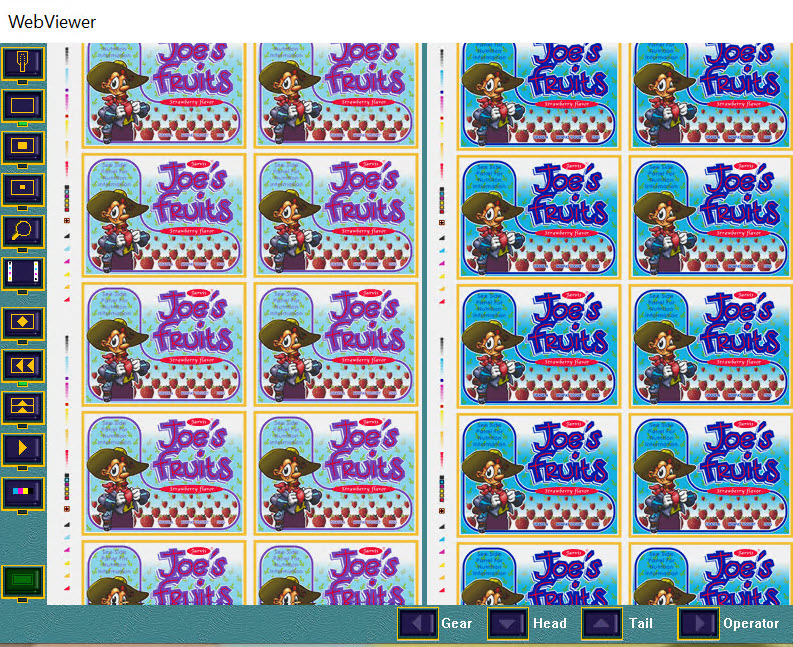
The web viewer is application in the simulator to view the printed images.
Just like on a real press, each time changes are made, a new print must be produced, and a new print copy collected to view.
Gravure Simulator
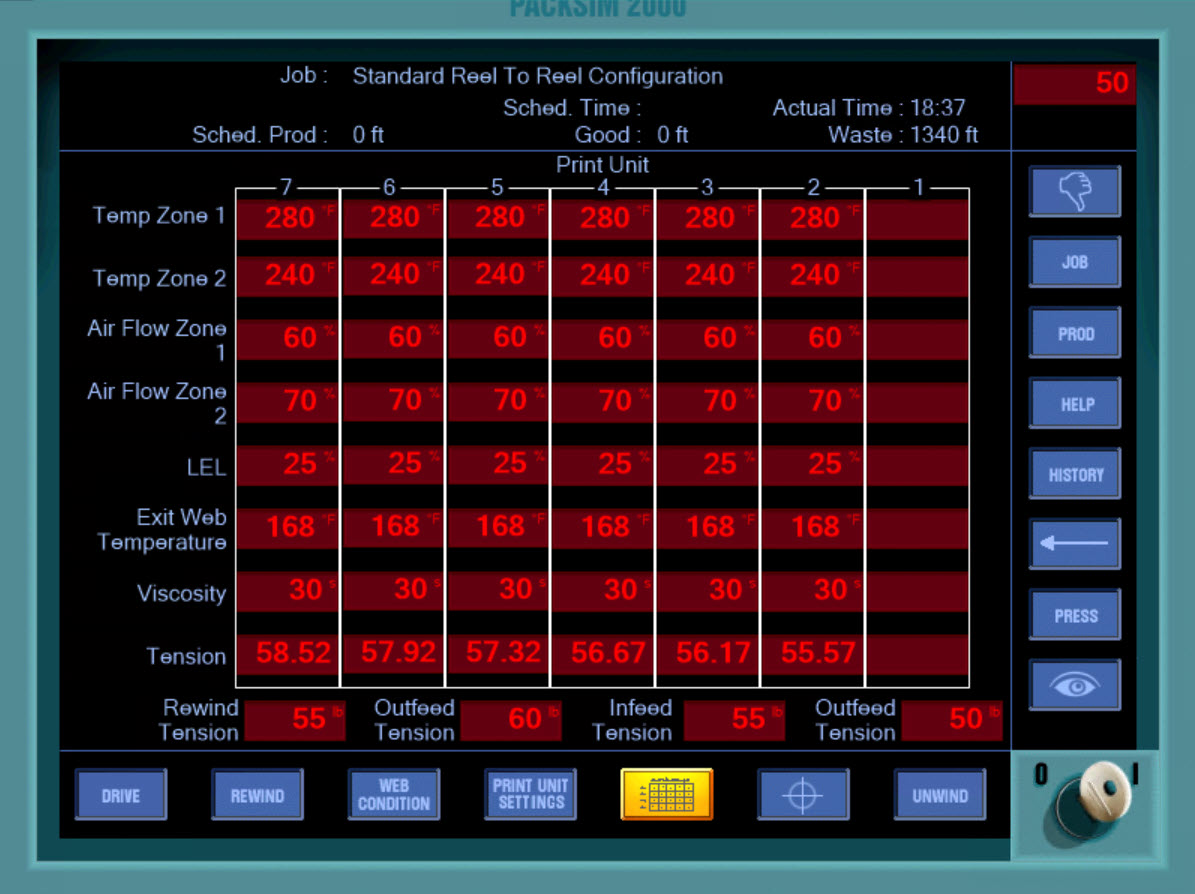
Print function
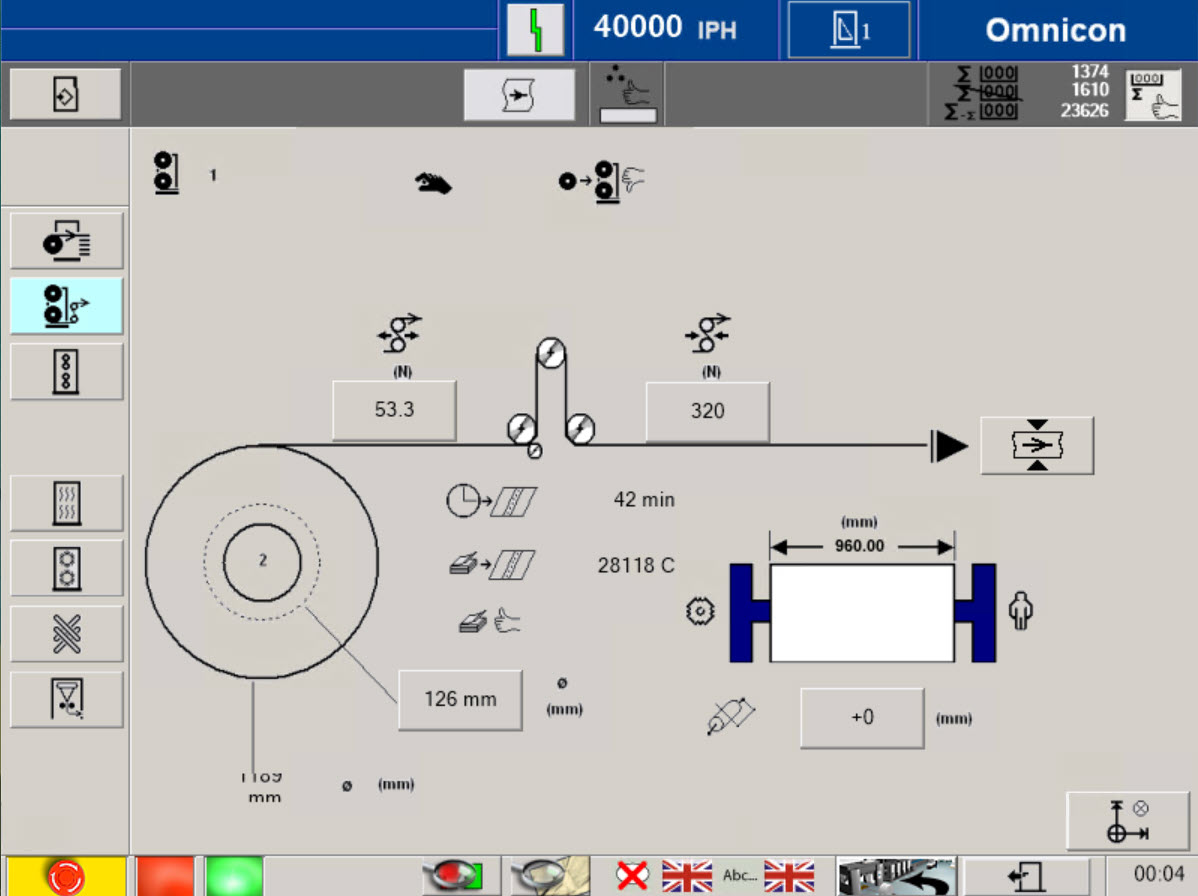
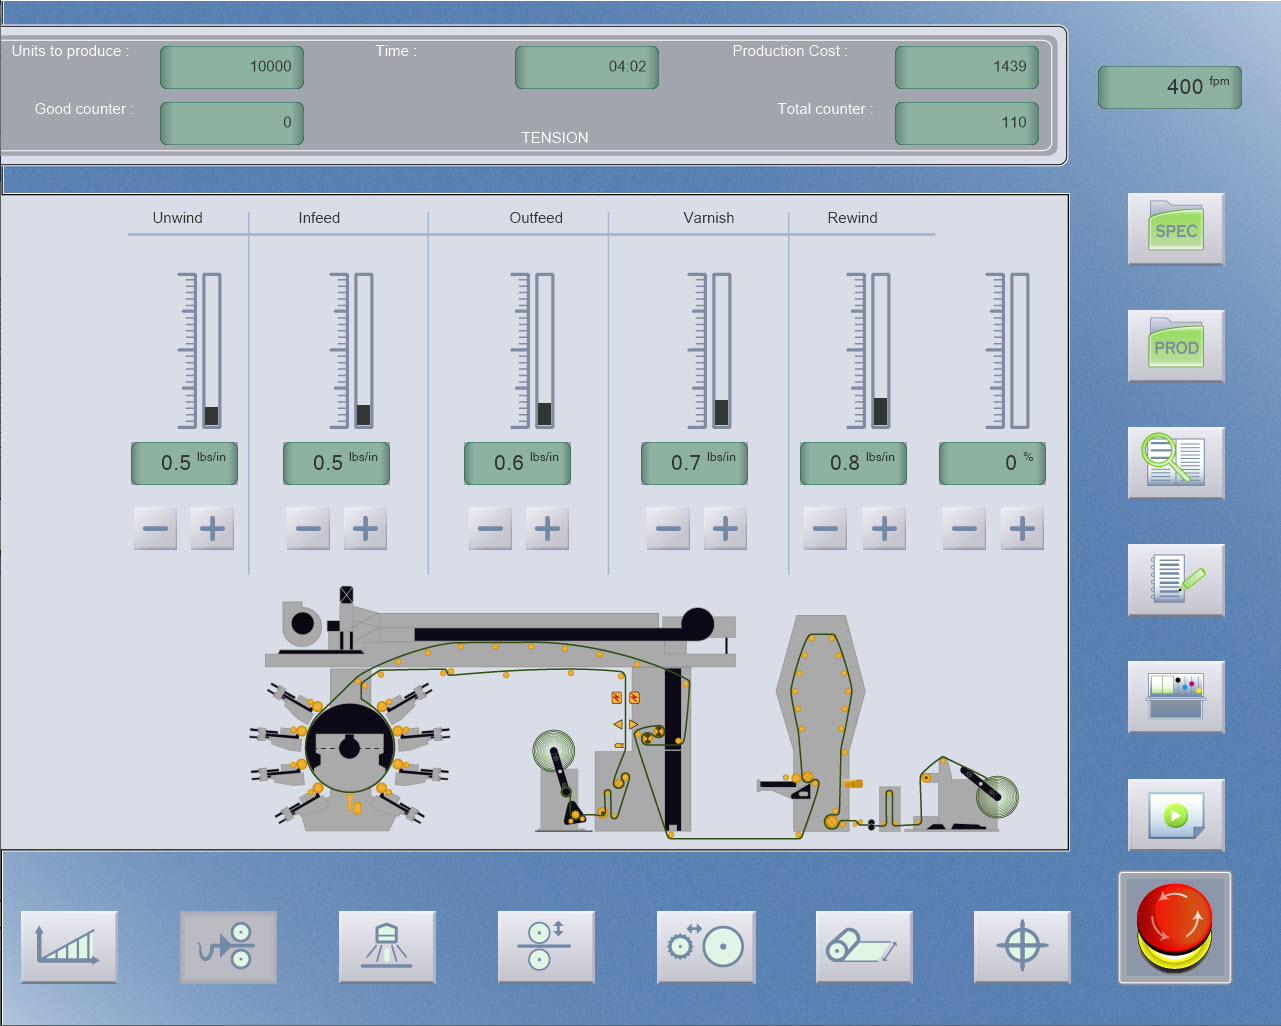
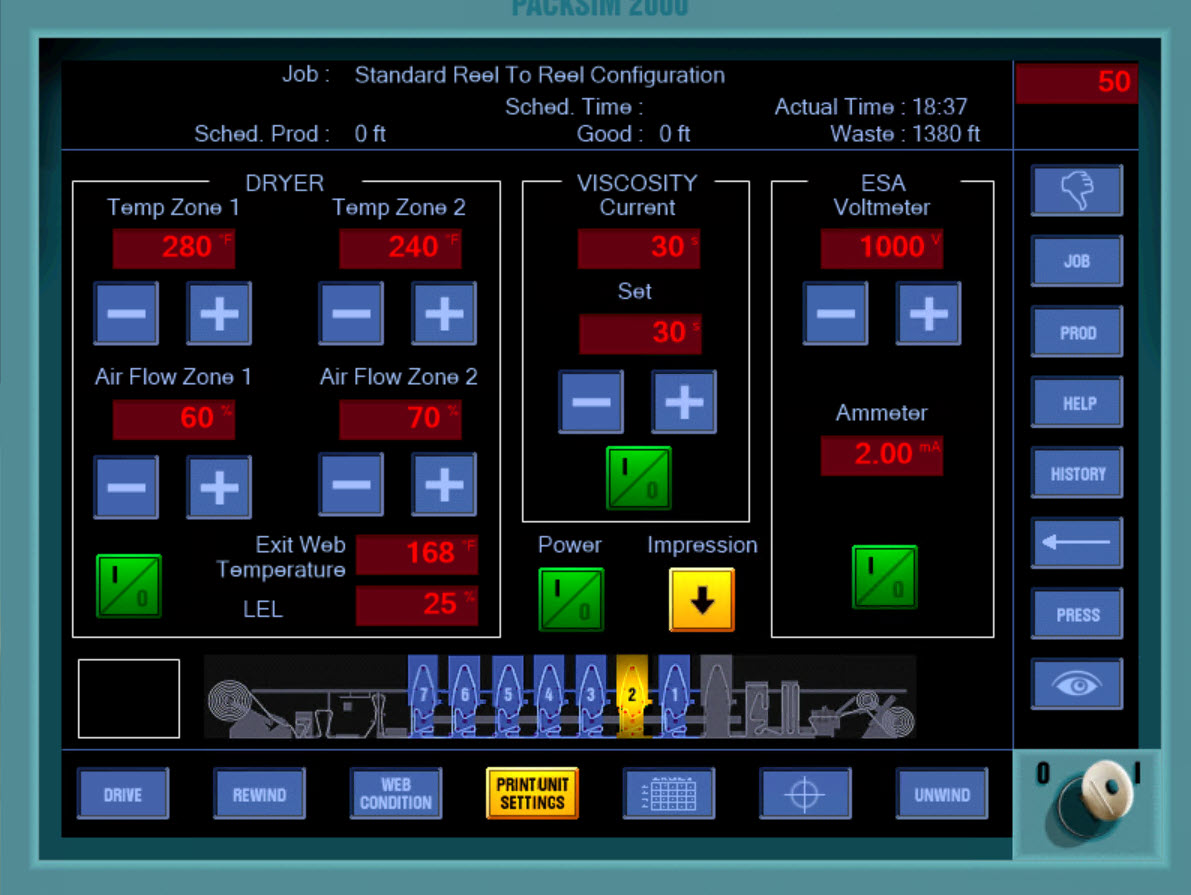
This panel shows for each unit in turn the dryer temperature, air-flow, LEL level, exit web temperatures, viscosity and web tensions.
This panel acts as a quick reference point, to check the press status at any time.
Gravure Simulator
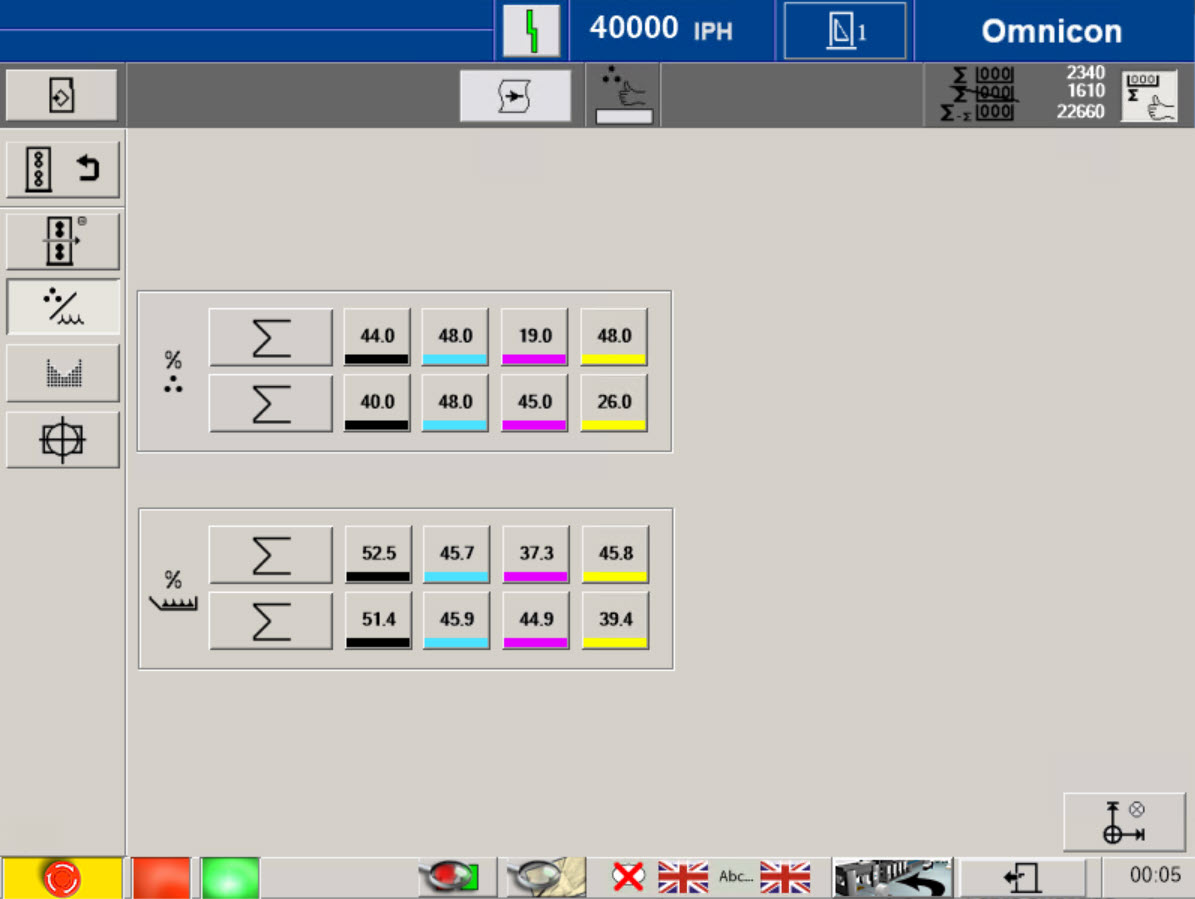
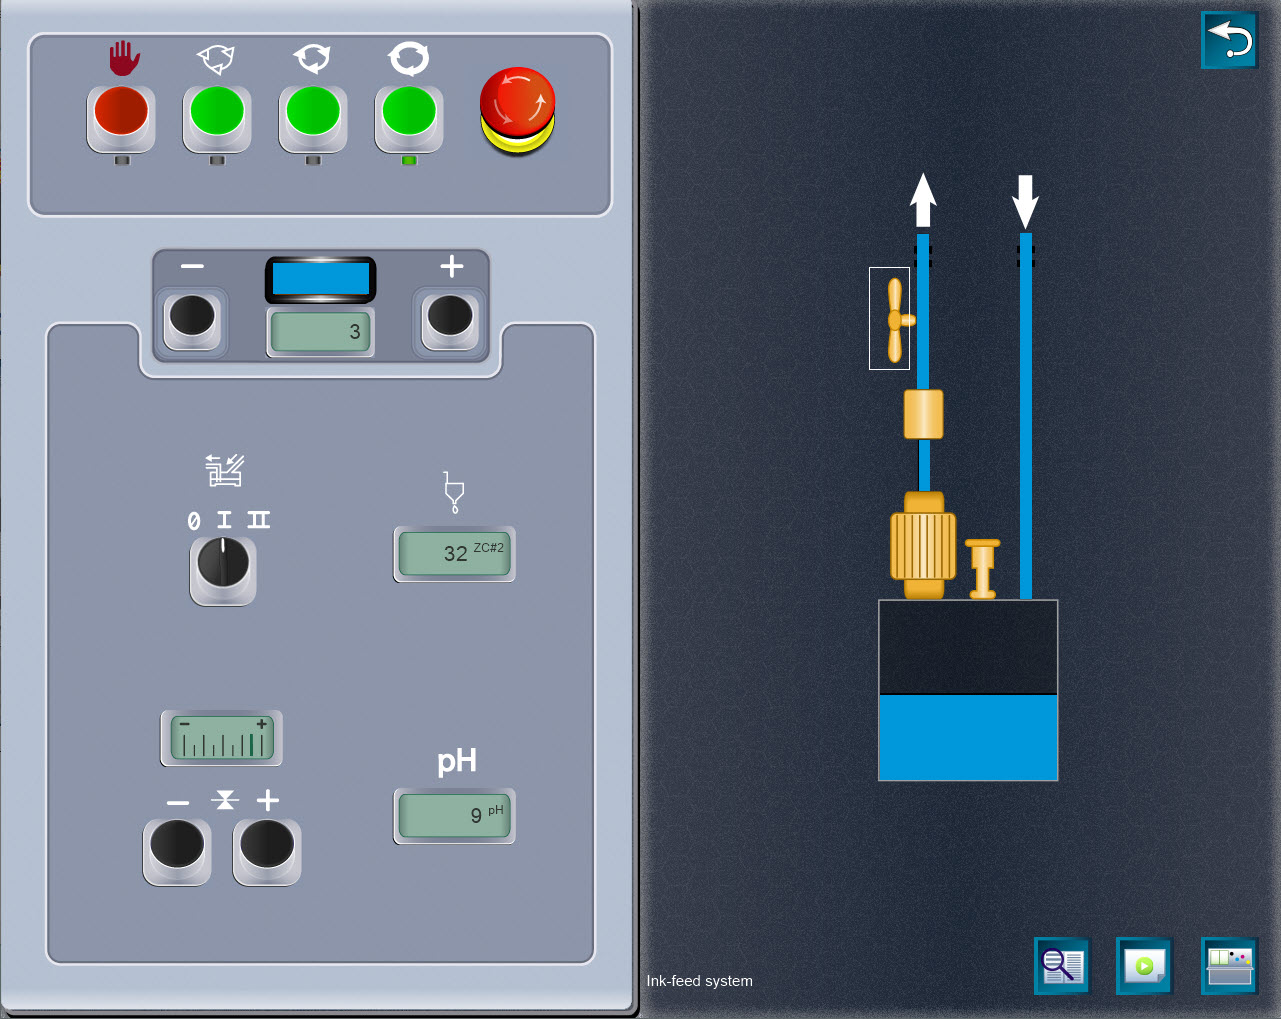
Ink and drying
From this panel, you can adjust most of parameter on printing unit such as viscosity, drying temperature…
Gravure Simulator
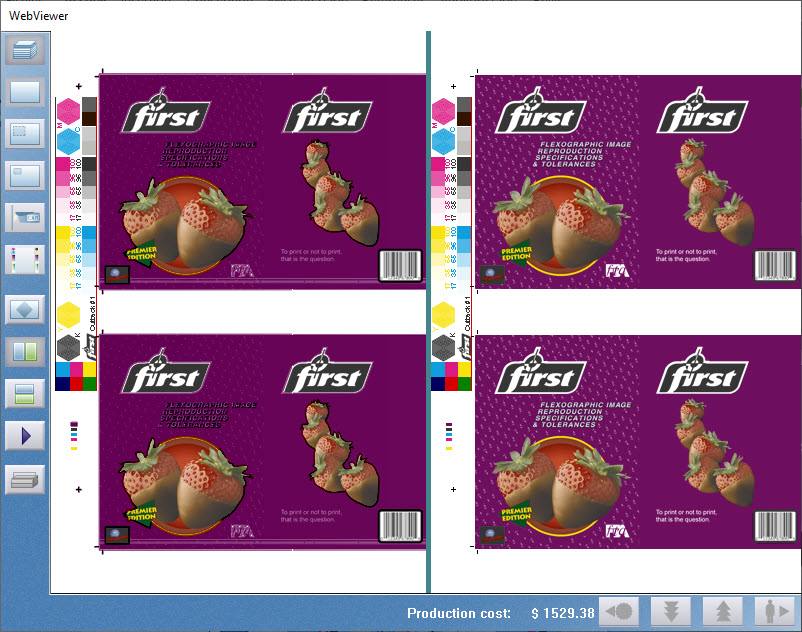
Print and ref
The web viewer is a key part of the simulator, not only displaying the current printed image, but allowing it to be viewed as a larger image, view both sides of web, directly compared print copy to a color OK copy that it must match (sometimes called print proof or contract proof), and also allows the use of five essential tools to view and measure print details.
Gravure Simulator
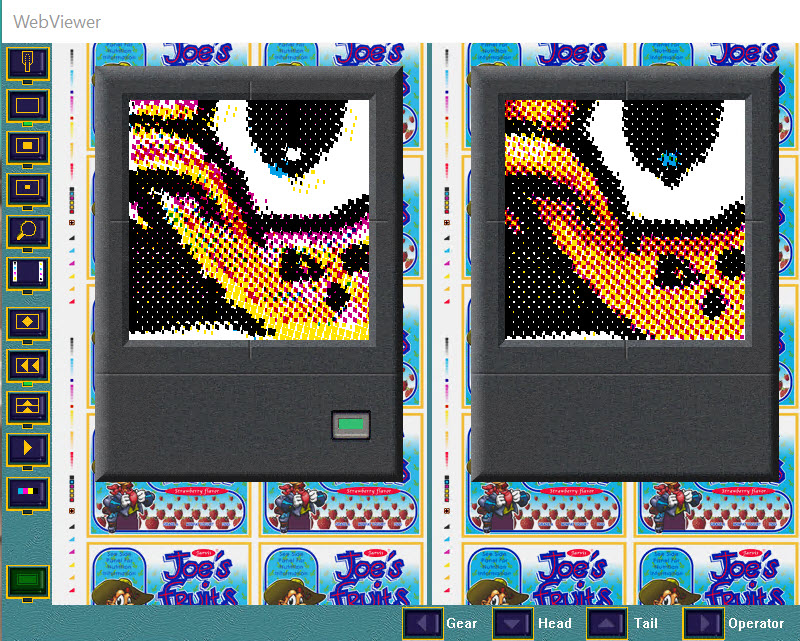
Magnifier
Registration is a key parameter in all forms of printing, and one of the most basic types of print fault.
Printing relies on the use of multiple colors in combination to make up images and colors.
They should be printed in the correct position relative to each other, for the image to be clear and sharp, with a true color reproduction.
Gravure Simulator
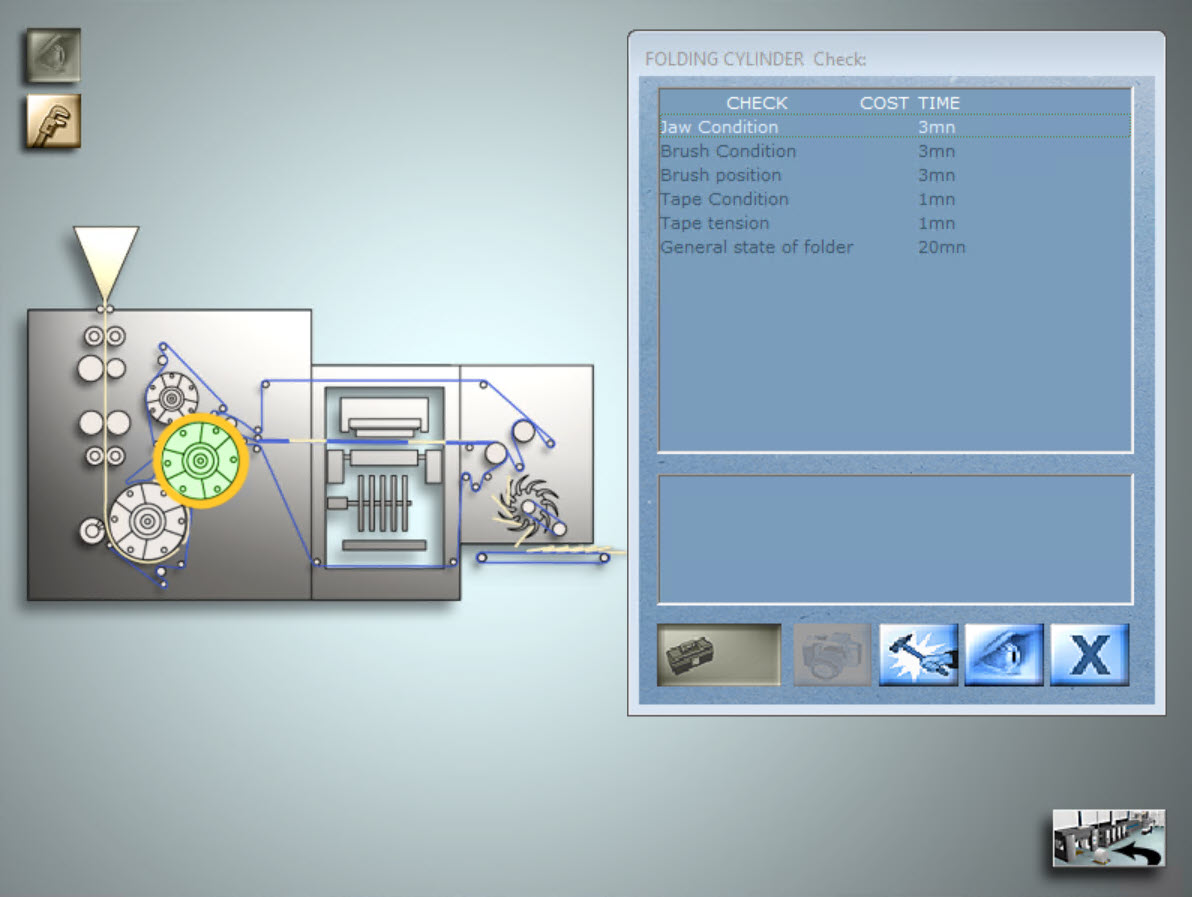
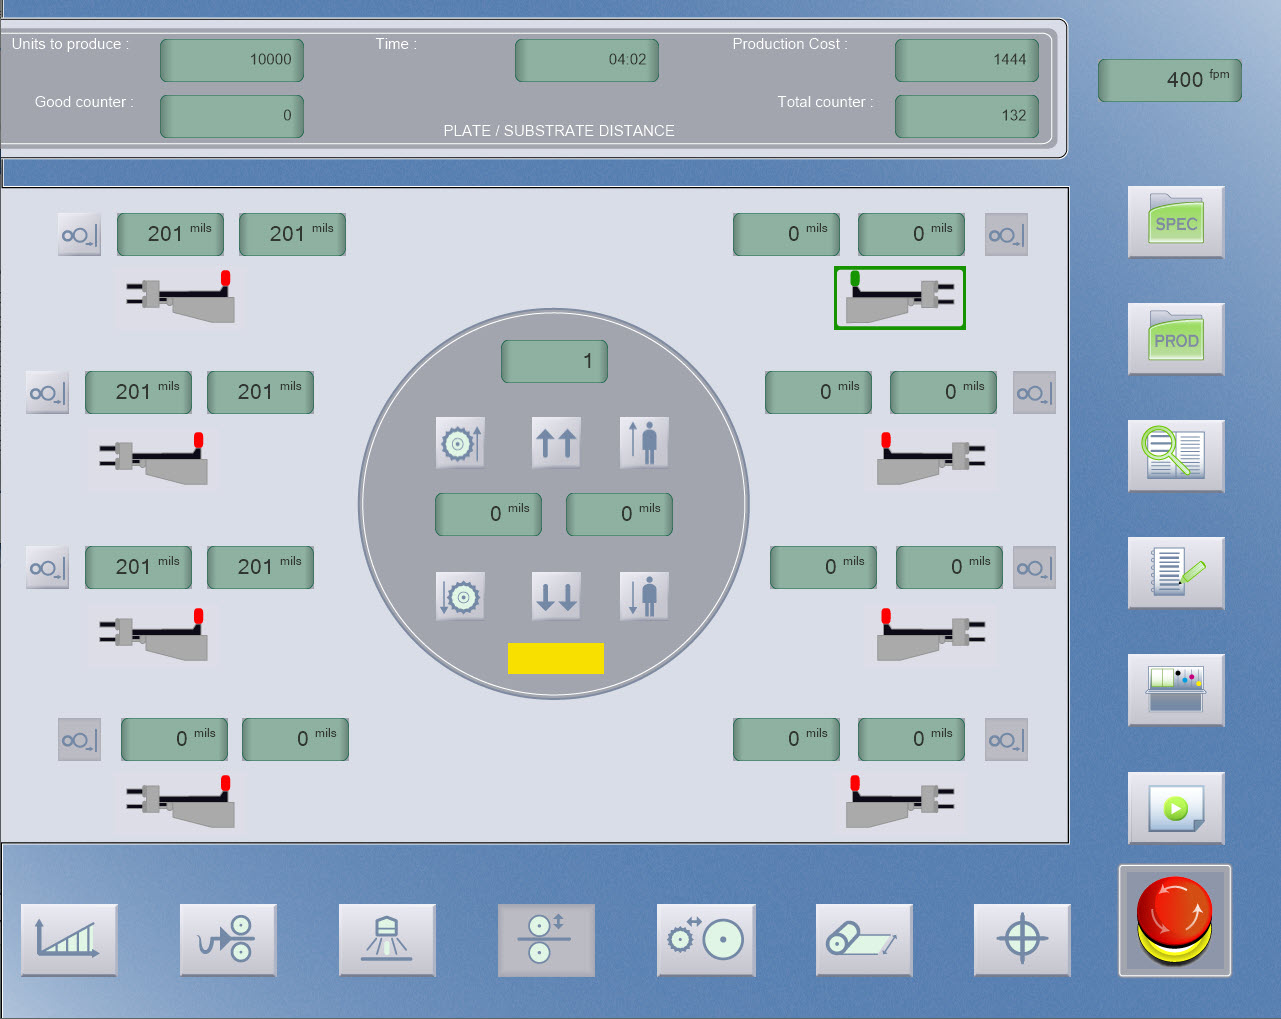
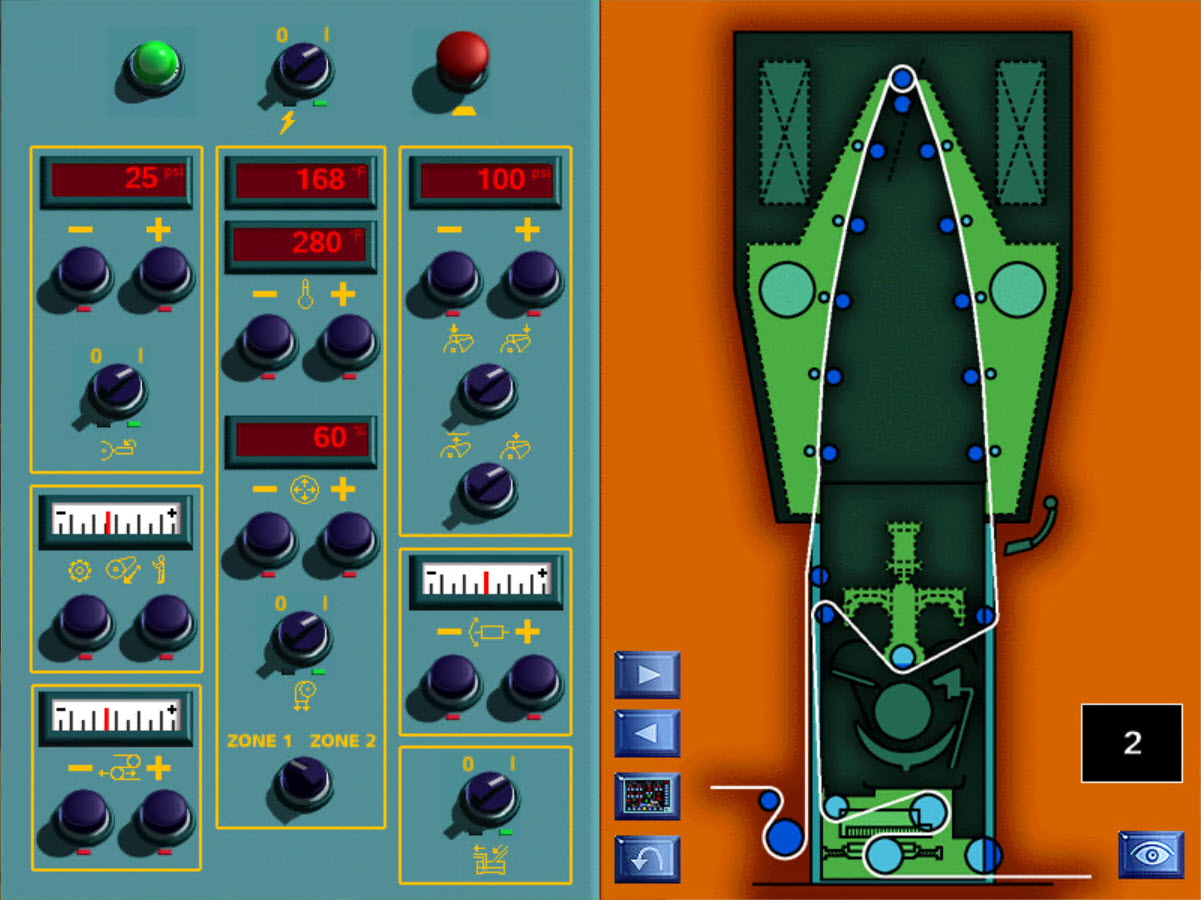
Print unit
Click on a press unit from the pressroom, or move to the print unit panel to see.
Here the control panel considers the ink delivery, ink doctoring, impression and compensator setting, drying, and register .